
RETECHNOLOGY PREMIUM MARKETPLACE RELATED PRODUCTS | WEBINARS | SPECIAL OFFERS


You are viewing our site as an Agent, Switch Your View:
Agent | Broker Reset Filters to Default Back to ListHow to Set Up Your First Facebook Ad!
July 10 2015
You can get your first Facebook Ad up and running in under 10 minutes by following these eight easy steps.
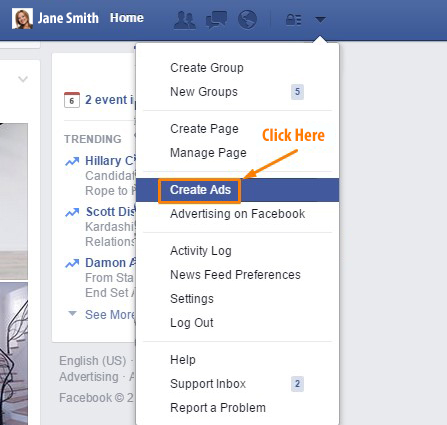
1) Login and Get Started!
Log into your Facebook account > Click on the drop-down arrow on the top right corner > Select Create Ads.
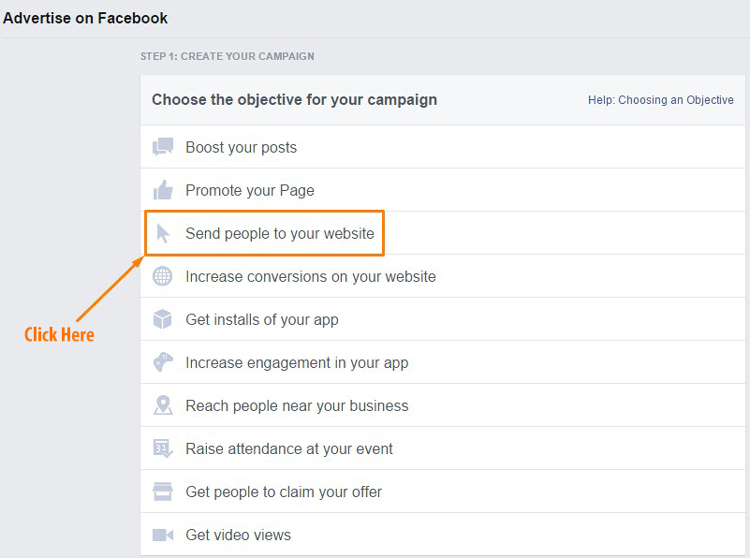
2) Select "Send people to your website"
You want to drive people to your website and capture leads. Select Send People To Your Website as your objective.
3) Enter Your Website Address
Enter the website domain name you would like to send traffic to.

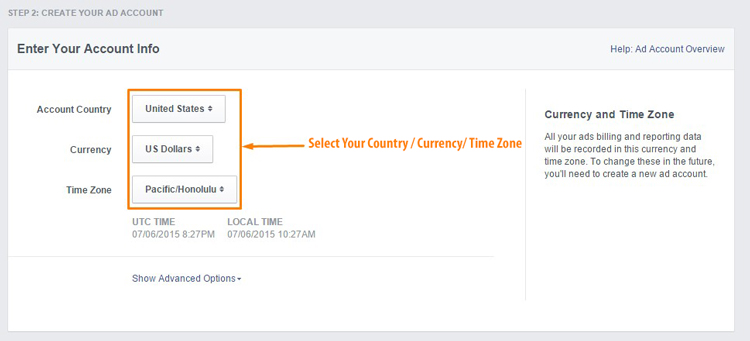
4) Choose Your Time Zone
Enter the info for your location, currency and time zone.
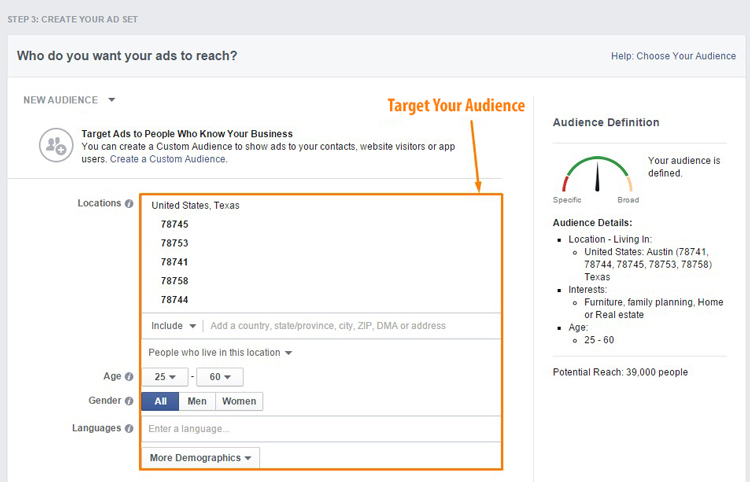
5) Set up Your Targeting
The biggest advantage to advertising on Facebook is that you are able to target your ad directly to a specific audience. This is a powerful tool that ensures you don't waste valuable advertising dollars showing your ad to people that don't have an interest in your service.
Target Location & Age
We recommend that you target the zip codes that you service and set an accurate age range for your potential clients.
*The following are optional targeting options. We recommend you implement the ones that make sense for your business. The goal is to serve your ads to those that are most likely to be interested in hiring a real estate professional.
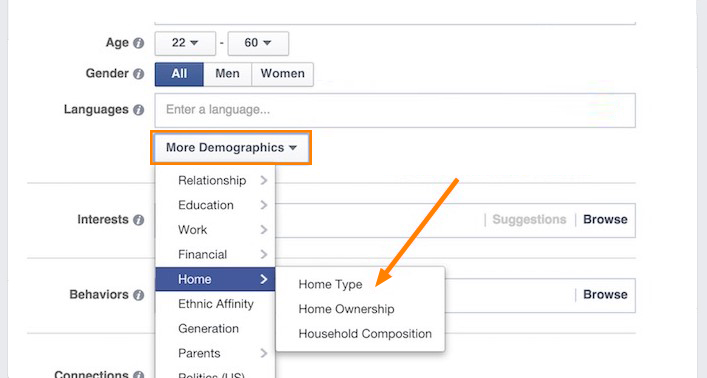
Target Demographics
There are so many different demographics to choose from. You can serve your ad directly to home owners by choosing the home category from more demographics. You may also want to serve your ad to those who are married, college graduates, earn a certain income and more. Make sure you take a thorough look into the demographics that are available.
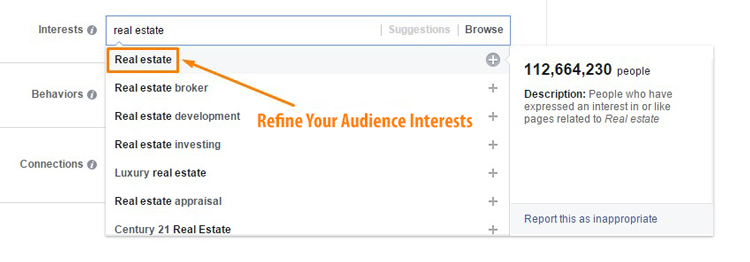
Target Interests
You can also target your audience by their interests, serve your ad to Facebook users who like real estate related pages and websites. This can be done by selecting the category of real estate or entering in specific real estate Facebook pages such Zillow, Trulia, etc.
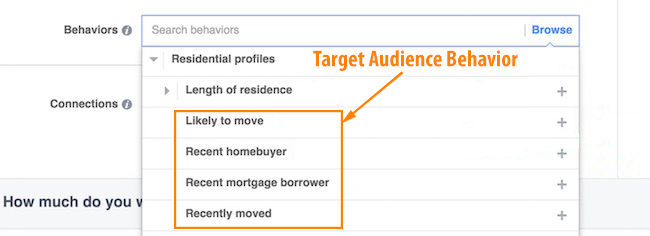
Target Behaviors
Similar to demographics there are many different behaviors to choose from. Targeting the "likely to move" behavior is a great way to reach an audience who is likely to need a Realtor soon.
Target People That Like Your Page
If you have a business page with a big following, it makes sense to target those that like your page as well as their friends. If you don't have a Facebook Business Page, ignore this step.
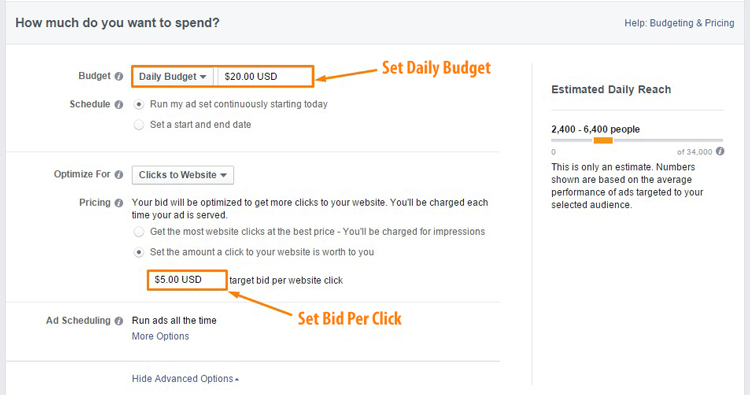
6) Set Your Daily Budget And The Bid Per Click
Facebook Ads are not free. In this step, you have to decide how much you are willing to spend on your ad. We also recommend that your end goal for the ad should be clicks not impressions. Impressions refers to how many times your ad is shown, while clicks is focused on how many times someones visits your website. It is much better to have more people take action on your ad than to have more individuals see it. After all the point of a good ad is to generate new leads.
7) Create Your Ad
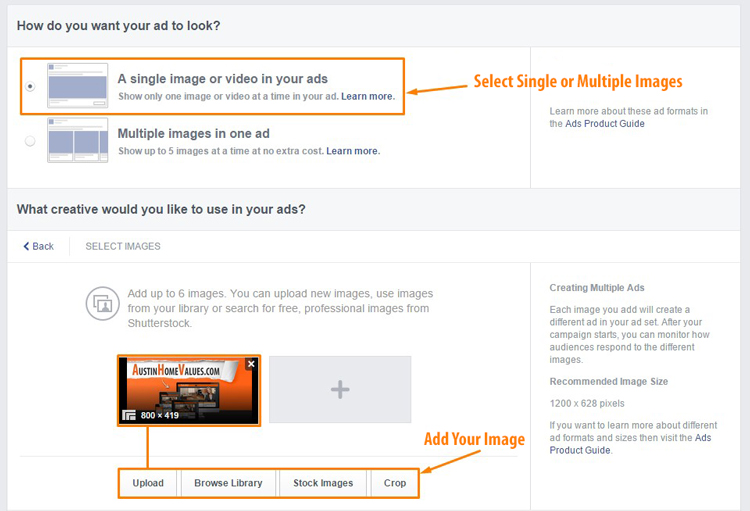
Select An Image
The first part of this step is to select which images you would like as part of the ad. This image can be uploaded from your computer or one you select from Facebook's stock image library. You can show up to five images in one ad but we recommend just starting with one to keep things simple.
IMPORTANT: Facebook ad images can only have 20% of text added to it, otherwise Facebook will decline your ad. You can test if your image is using the correct amount of text with this tool: http://ow.ly/PkUS5
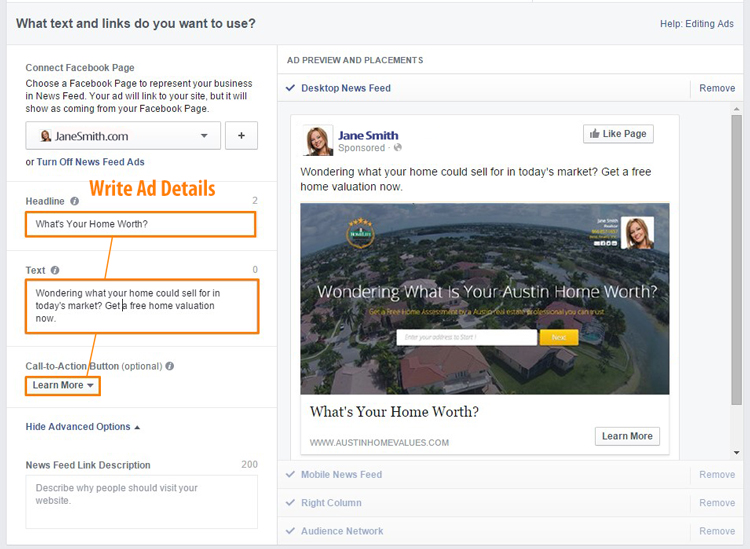
Write The Content
Now that you've got an image(s) set up, it's time to work on the content of your ad. Here you will be able to include a Headline, Text, CTA Button and News Feed link Description.
On the right side, you will see a preview of how your ad will look like across all Facebook pages. Remember you want your ad to encourage your audience to take action. The following are example titles that could be used for an ad encouraging home owners to get a free valuation.
- Get a fast and free home value report for the current Denver market.
- Order your free home listing price report, know your home's value.
- Thinking of listing your home? Get a free listing value report here.
- Is it time to sell your home? Get a free value report to decide.
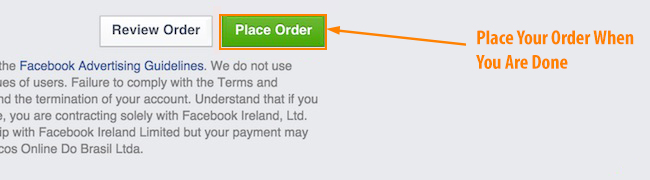
8) Place Your Order
This is the easy part, simply click on "Place Order" and your ad will be sent for a final review by Facebook. It should be approved and live within a few minutes.
To view the original article, visit the WebsiteBox blog.