
RETECHNOLOGY PREMIUM MARKETPLACE RELATED PRODUCTS | WEBINARS | SPECIAL OFFERS


You are viewing our site as an Agent, Switch Your View:
Agent | Broker Reset Filters to Default Back to ListHow to Add a 'Reviews' Tab to Your Facebook Business Page
June 19 2018
You already know that Facebook reviews are imperative if you want to grow your business.
But did you know that you can add a 'Reviews' tab to your Facebook business page to show off reviews from your clients?
Here's how:
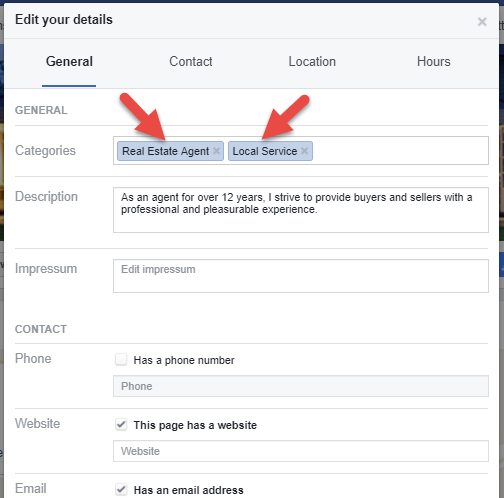
Step 1. Edit your "About" section to include "local service" and "real estate agent"
-
Click About>General>Categories>Edit
-
Type in "Local Service" and "Real Estate Agent"
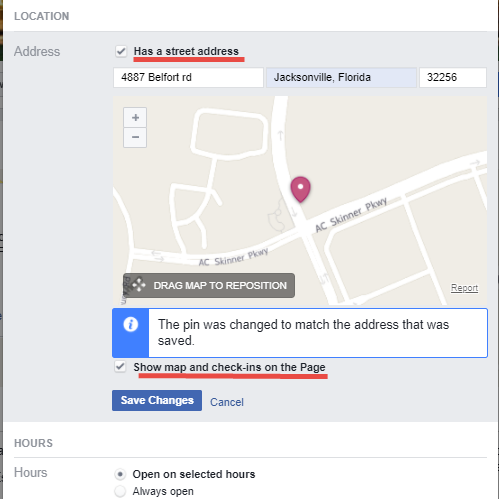
Step 2. Add your location to the map
-
Scroll down to location and check the box that says "Has a street address"
-
Type in your business address
-
The map will drop a pin at your address
-
Verify that it is accurate
-
Check the box that says, "Show map and check-ins on the page"
-
Click "Save Changes"
Step 3. Add the Tab
-
Go to your Page and click Settings on the top right
-
Click Edit Page in the left column
-
Scroll to the bottom and click Add a Tab
-
Click Add Tab next to where it says "Reviews"
-
Click Close
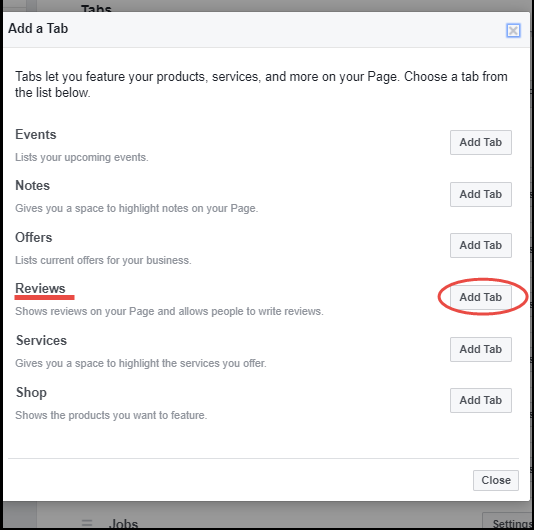
That's it! You should now see the "Reviews" tab on your Facebook business page.
If you want to know the one trick to getting your clients to give an instant Facebook review, you can read about that here.
To view the original article, visit the HomeASAP blog.