How To: Protect Your Privacy Online
May 31 2011
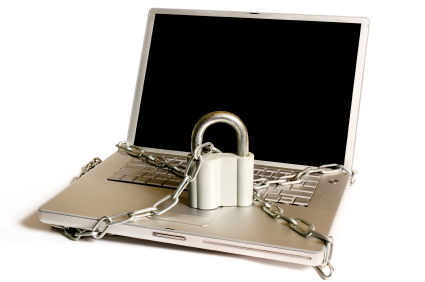
Although most of your Internet use takes place on your private computer or mobile device, your data may not be as private as you think. Sure, there are advanced ways to address these privacy risks, but how many REALTORS® have the bandwidth or technical expertise to get them done? We wanted some simple, plain English steps to protect our privacy – so we went out and found them.
Step 1: Trust Your Instincts
Does clicking that link seem like a bad idea? Is there something “not quite right” about that email? Do you have doubts about entering your personal information? If you have a gut feeling that something is wrong, it probably is. Why take an unnecessary risk?
Step 2: Read the Fine Print
Tedious as it may be, read the privacy policy for the Web services you use and the sites you visit. Then, of course, don’t use a site if you’re not comfortable with the way they’ll share your information. You may also discover that you have the ability to change how the site uses your private information (i.e. with Facebook). Customize settings so that you feel comfortable.
Step 3: Create an Online Alter-Ego
Are you being prompted to sign up with your birthday? Is it a required field? If so, use a fake birthday. In fact, you can fake any information on these sign-in forms if you so choose. Cyber criminals can use simple facts like your date of birth to do some serious damage.
Have some fun creating your online alter-ego, 007!
Step 4: Open an Alternate Email Account
It’s difficult enough for REALTORS® to manage the daily onslaught of emails without the endless barrage of SPAM. To keep your personal and business email accounts as clean and easy-to-navigate as possible, consider creating a “throw away” email account. You can use this email address for forms that require contact information but don’t represent a site you’d like to hear more from.
Step 5: Use a Temporary Credit Card
Although, in a perfect world, you account information wouldn’t be at risk through online transactions, the truth is that it very well could be. While it’s true that a credit card is required for most online purchases, it doesn’t have to be your primary credit card. Instead, consider using gift cards or “safe shopping” cards so that, if anyone gets hold of your info, they’ll face a spending limit, an expiration date and a lot of frustration.
Step 6: Don’t Share Your Location
Facebook Places and other apps will share your physical location online. You may think you can control who sees this information – don’t count on it. The best idea is to avoid these apps.
Step 7: Use Private Browsing Options
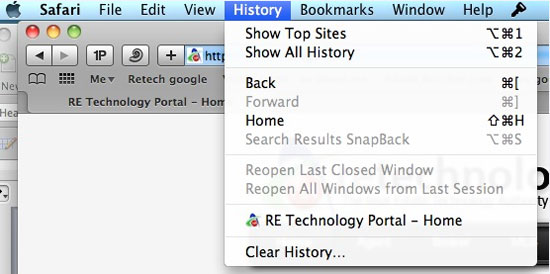
Some browsers will offer you a “safe” browsing option. In Internet Explorer this is called InPrivate Browsing; in Google Chrome it is called incognito browsing; in Safari it is called private browsing, and in Firefox it is called – you guessed it – private browsing. By using one of these options, your browsing session will essentially leave no footprints and will reveal no private information to the next person who uses the computer. Not sure if your browsing session was truly private? Clear the cache on your browser just to be safe.
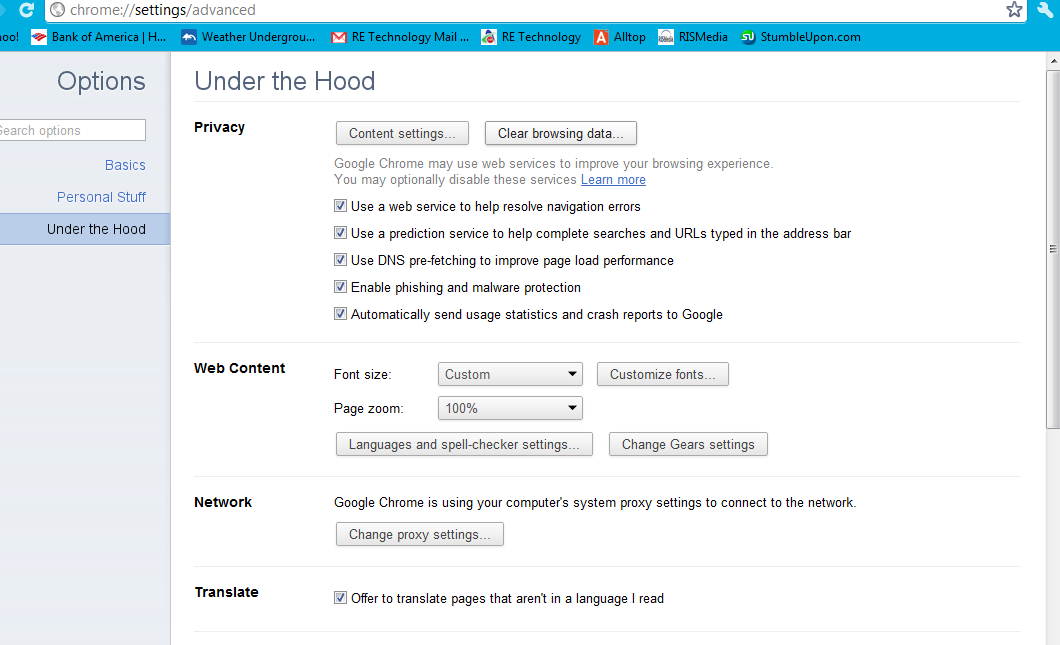
Clearing the Cache in Google Chrome
Under “Options” and “Under the Hood,” click the “Clear browsing data” button.
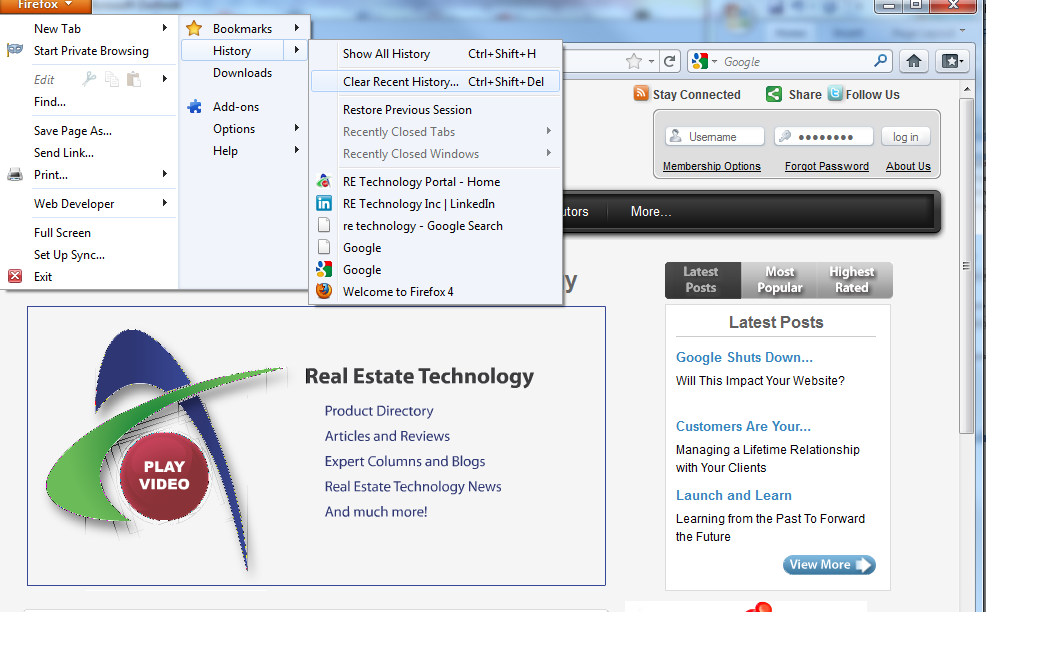
Clearing the Cache in Firefox
Under “History,” select “Clear Recent History.”
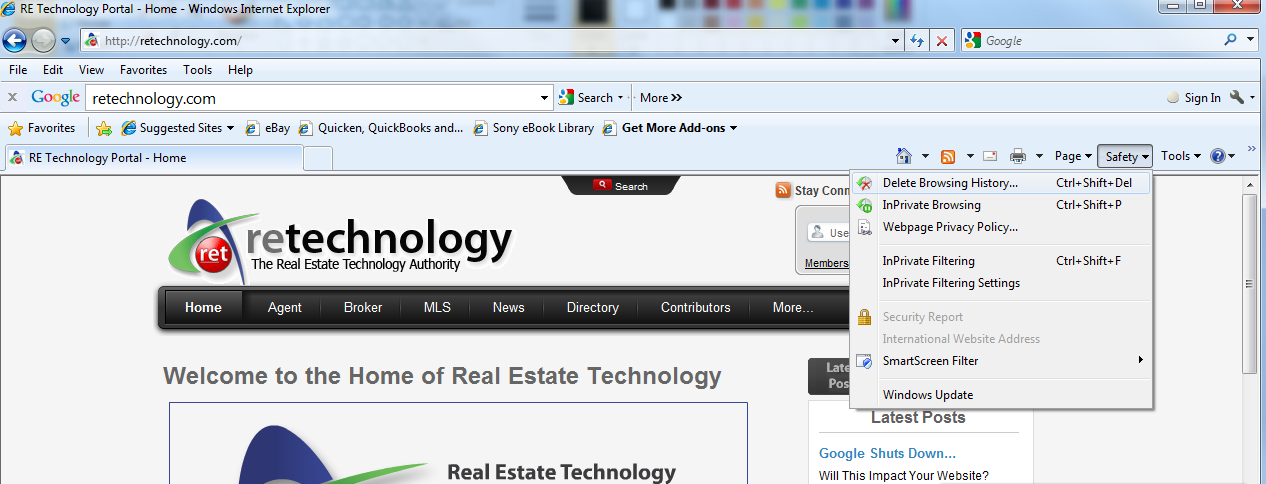
Clearing the Cache in Internet Explorer
Select “Safety” and then “Delete Browsing History.”

