
How to Leverage Google Maps for Real Estate
December 16 2015
Google Maps is a wonderful (and free!) tool that's more than just a handy navigational guide. When leveraged in the right way, it offers real estate professionals an easy way to show off their local expertise.
The simplest way to do this is to create your own map and share it with clients or embed it onto your website. Imagine the applications--before multi-home tour with your buyers, you can create a map of all the properties you'll see and share it with your clients so they can follow along on the map and get to know the neighborhood better. You can even highlight nearby attractions in the map so they better understand what the area has to offer. Or, in the spirit of the season, you can create a map that marks where all the best holiday light displays in your town are and embed it onto your website. How about making a map of local schools and parks for prospects with children? The possibilities are endless!
Creating your own custom Google map is easy. Just follow the steps below to get up and running in just minutes:
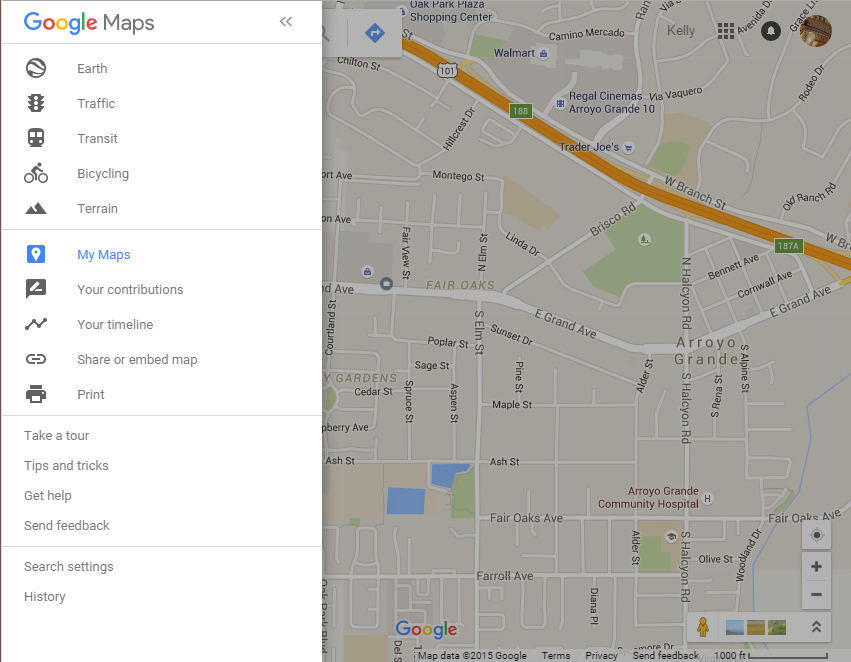
1. Go to maps.google.com.
2. Click the Menu icon (it's the three horizontal black lines immediately to the left of the search bar).
3. Select My Maps, as highlighted in blue in the image below:
4. Click Create Map at the very bottom of the next screen.
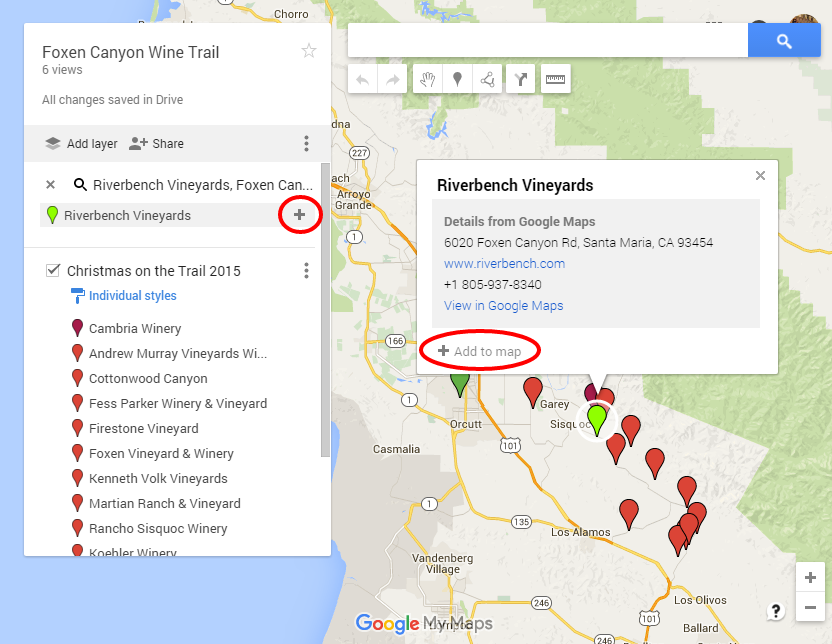
5. Simply type the name or address of the first location you want to add to your map in the search bar. The list will autopopulate with suggested places. Click on the correct the location.
6. To add this location to your map, either click Add to Map on the address card that pops up or the plus symbol (+) on the lefthand menu. Repeat this process to add as many locations as you'd like.
That's all there is to it, and now it's time to share your map! To do this, first you need to make sure your privacy settings are correct. By default, only you can see your map. To change this so that others can view your map, click the Share icon, then click Change on the next screen (see below).
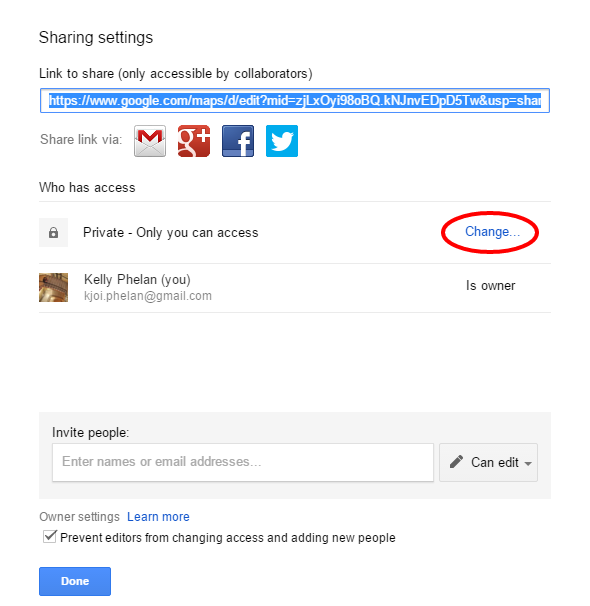
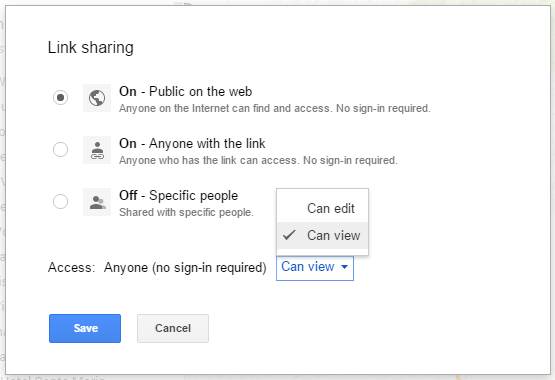
If you want the map to be visible to anyone, as you would if you're embedding it onto your site, select On - Public on the web. If this is, say, a map of a multi-home tour for your buyer client, choose either of the other two options (note: Off requires the people you shared with to have a Google account and be signed in to view).
Don't forget to select the Access level, too. We recommend selecting Can view. This means that whoever can access your map can only view it, not make changes to it. If you want to make the map a collaborative tool between you and your clients, select Can edit (not recommended for maps you share with the general public).
Now you're ready to share. You can either share the link via social media or email, or directly invite individuals to view it.
To embed a map on your site, click the three grey dots next to the Add Layer and Share buttons from the map view. Select Embed on my Site then copy and paste the provided code anywhere you'd like your map to display on your website.
There you have it--an easy way to leverage Google Maps. Do you plan to create and share any maps using the steps above? If so, how do you plan on using them? Let us know in the comments below.