
RETECHNOLOGY PREMIUM MARKETPLACE RELATED PRODUCTS | WEBINARS | SPECIAL OFFERS


You are viewing our site as an Agent, Switch Your View:
Agent | Broker Reset Filters to Default Back to ListIntroducing RPR's® Sales Comparison Analysis
January 10 2014
Interviewing an appraiser for my series on RPR® got me curious about their tools built specifically for appraisers. So I attended a webinar about one of their newer appraiser tools: the Sales Comparison Analysis and Valuation Workbook. I'm going to walk you through what I learned.
About the Sales Comparison Analysis
With the Sales Comparison Analysis tool, appraisers can use area sales information as well as comparable properties in a valuation analysis; confirm or adjust subject property information; select, adjust, and weight comps; and create a Valuation Workbook. The language and format of the Valuation Workbook is UAD-compliant.
How to Find It
The Sales Comparison Analysis tool can be found from any property record. It's under the Comp Analysis tab. You'll be prompted to enter your Appraiser license number, although it's not required to use the feature.
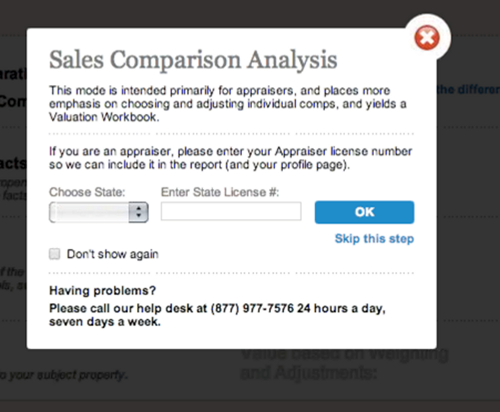
Once you've done that, you can follow the clear instructions to create the Sales Comparison Analysis and Valuation Workbook.
Step 1: Confirm Home Facts
This is pretty self-explanatory. In addition to basic home facts, you can adjust factors like view, style, and quality of construction.
Step 2: Search for Comps
You can add comps in several different ways – adding a known property or searching an area to find comps. If you're using the search option, you can use the tools to draw a box, radius, or polygon around an area.
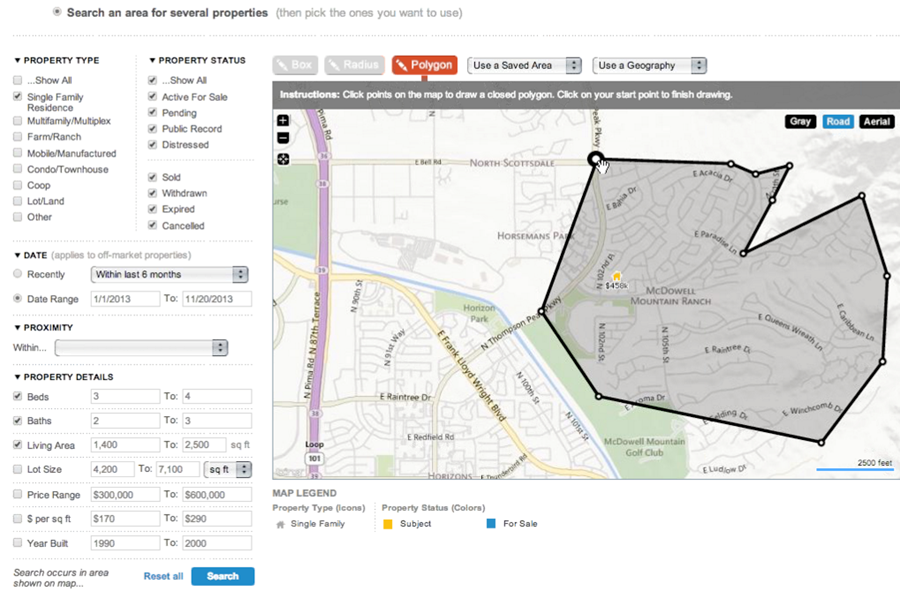
You can also use a saved area from a past search. In search results, a blue star indicates properties used to create the RVM.
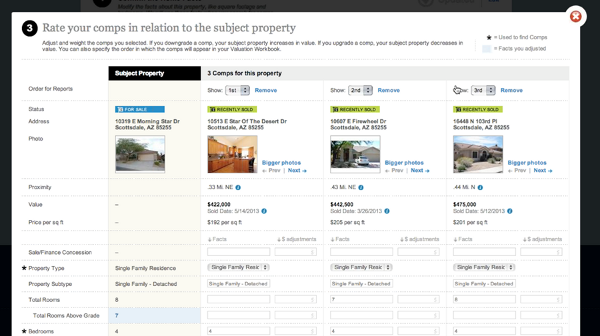
Step 3: Make Adjustments to Comps
Designed specifically for appraisers, this features allows you to:
- Change the order in which comps appear
- Adjust comps as needed
- Add descriptions
- Add your own fields to reports
- Add specific notes about each property; decide whether or not you want to include them in the final report or whether they're for your eyes only
- Adjust comp weighting
Step 4: Review Sales Comparison Analysis
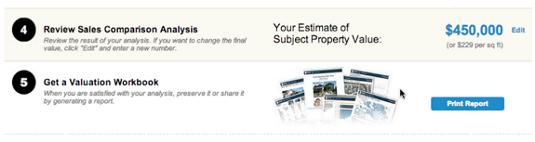
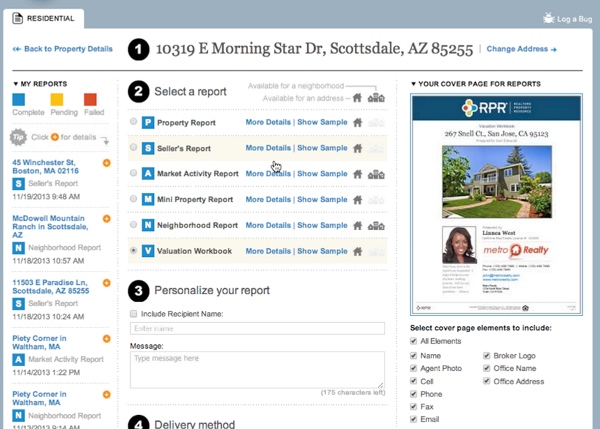
Step 5: Create a Valuation Notebook
The Valuation Workbook can be personalized and adjusted. You can also decide whether you want to email it or print it. After it has been created, the report is stored for 30 days.
Tip: To further personalize your report, you can build a custom cover by visiting the Help Desk. Search for "templates," then select "Can I create a custom cover for valuation workbook?" You'll then be able to download a Word document to edit and save as a .pdf file.
Next Steps
If you're interested in learning more about RPR®, check out the series of articles we've been publishing. You should also view the playlist about the Sales Comparison Tool on RPR®'s YouTube channel. Of course, you can visit our product directory or www.NARRPR.com.