
RETECHNOLOGY PREMIUM MARKETPLACE RELATED PRODUCTS | WEBINARS | SPECIAL OFFERS


You are viewing our site as an Agent, Switch Your View:
Agent | Broker Reset Filters to Default Back to ListHow to Turn One Piece of Real Estate Content Marketing Into 10
June 30 2016
In the eyes of some agents and brokers, creating a variety of real estate content is a time-consuming, arduous task — akin to washing a floor with a toothbrush and running a marathon. What these professionals don't realize, though, is they can cut their real estate content marketing time in half (or even more) by having a plan ahead of time for crafting their promotional collateral.
In other words, if you know how to turn one piece of content into, say, 10, and do it in one relatively short content creation session instead of a handful, wouldn't you rather get it all that work done at once? Turns out you can — all you need is the right strategy and dedicated time set aside.
Continue reading below to see a prime example of how you can develop just one type of content for your real estate marketing plan and quickly turn it into several new pieces to aid your digital presence, use across numerous channels, and save you time that you can allocate elsewhere.
1. Start with an infographic — perhaps one that features a couple dozen tips and tricks on house hunting.
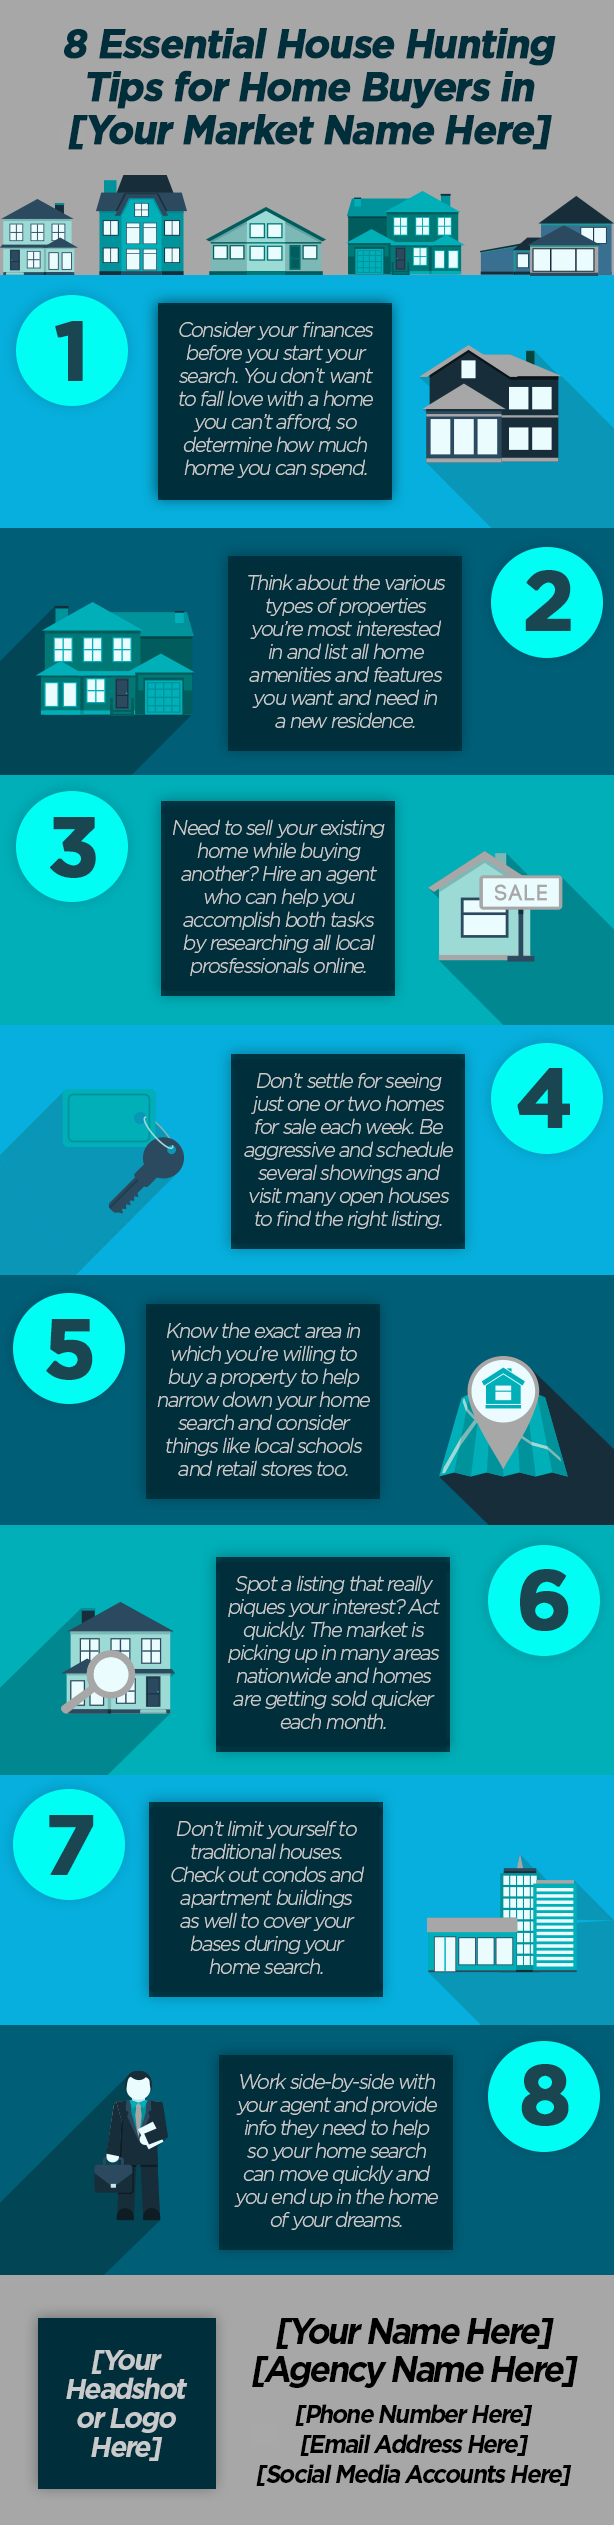
Canva, Piktochart, PicMonkey, Photoshop, Illustrator — we could go on and on about the many intuitive graphic design resources agents can use to craft visuals for their real estate marketing strategies. However, the point is this: Within an hour, you can easily create an infographic like the one above — and turn that into several other pieces you can promote online.
Note how the copy is relatively minimal in the graphic. Unlike blog posts, guides, reports, and ebooks, infographics are mostly about developing an aesthetic that looks sleek and informs on a topic of interest — in this case, house-hunting tips for prospective home buyers in your market. Also note that it doesn't take a great deal of effort to come up with tips like the ones featured in this example. You have a wealth of knowledge on countless facets of the industry, including what it takes to begin a home search, so simply jot down the most helpful and lesser-known ideas and insights your audience may not know, turn those ideas into copy, and order them in a manner that makes sense.
What's important to remember is your branding visuals and contact information. To keep the focus on the content itself, it's optimal to include these details at the bottom of the infographic. While you're at it, share the URLs for your Facebook, Twitter, and other social media accounts. That way, those who share the graphic on their sites and other digital outlets will know the mastermind behind the marketing masterpiece.
2. Create one real estate blog post that includes the info from the infographic along with additional advice.

Whether or not you include your infographic in this post is entirely up to you, but the vital thing is to optimize the copy from your graphic for search and produce an article that expounds upon your visual marketing piece.
For example, the first tip featured in the infographic tells prospective buyers to closely examine their personal finances prior to hitting the market. In the real estate blog post you produce around the graphic, though, you can offer more intricate advice, like how buyers can successfully audit their fiscal situation and ensure they're 100% ready to buy a home: determining monthly take-home pay, anticipating raises/bonuses at work, figuring out how to save more, understanding all debts owed, and so on.
In short, whereas you spent most of your time jazzing up your infographic to make it aesthetically pleasing, you should spend your time and energy writing an article around that graphic that goes into greater detail. It's the consistent, constant production of these types of posts for your real estate blog (and website at-large) that will eventually garner you success with your search engine optimization strategy and inform your audience.
3. Segment each piece of advice featured in your infographic into a more fleshed-out blog post.
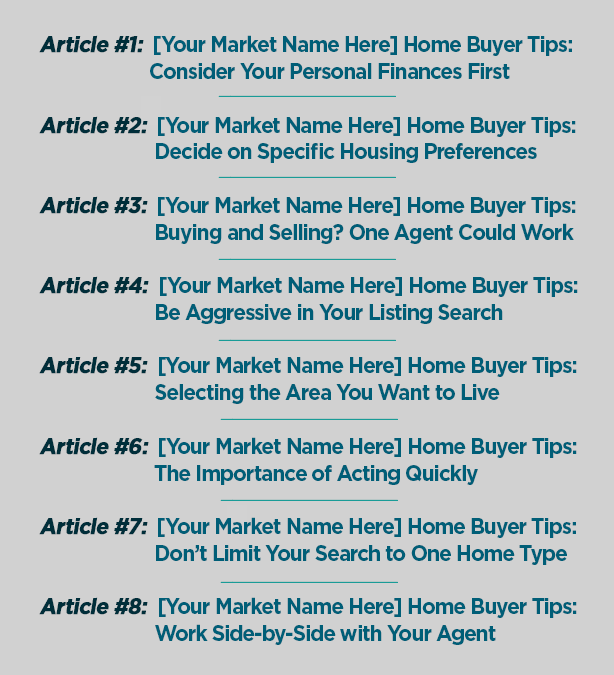
In the weeks and months following the publication of your infographic and explanatory blog post covering each tip and trick from the visual, flesh out a real estate blogging editorial calendar that includes individual articles centered on each piece of advice you dispense in the graphic. You might initially think "How am I supposed to write a lengthy, educational post on a single suggestion for buyers?" The answer is simple: Dive deeper into each recommendation for your audience by conducting a bit of research and digging deep into your brain (not literally, of course).
Even if you're a beginner real estate agent, you have the basics down regarding how home purchases work — everything from how to help clients make the initial offer, to working with vendors like insurance reps, to finalizing deals and organizing the paperwork — so jot that knowledge down on paper (or your computer screen) and use that it to write more in-depth posts on each tip featured in this graphic.
Your expertise may seem like common knowledge, but many home buyers simply don't understand the nuances of the home purchase process like you, so explain broad, high-level concepts to them in visual real estate marketing collateral and then break them down further in these types of articles (and potentially even other long-form content, like ebooks).
4. Post the infographic in its entirety to your SlideShare account. (You have a SlideShare account ... right?)
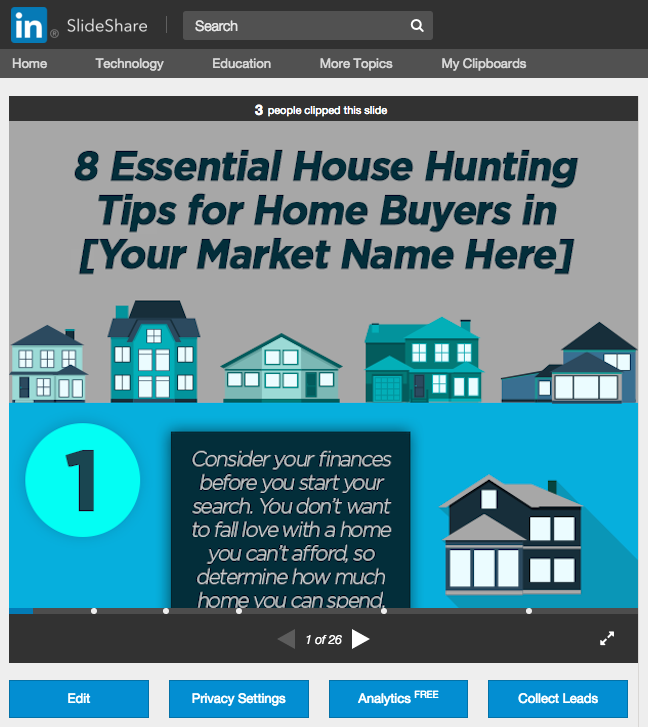
Yes, the chief goal for your real estate marketing plan is to drive your audience to your website and keep them there — but let's not forget the power of using other digital channels to generate awareness of your brand and, ultimately, push people to your site. Securing backlinks on other popular sites is a popular and efficient means of getting more site visitors, and one of the easiest ways to get backlinks is to create them yourself via your very own SlideShare account.
With SlideShare, you can publish any visual marketing items you craft, including infographics, PowerPoint presentations, and PDFs. If you choose the latter file type, you can use Adobe Acrobat Reader to add links in the infographic or other marketing collateral you created so when those browsing your design mouse over the visual, they can click a relevant link that leads them back to your site. For instance, for the portion of your graphic that discusses how buyers can investigate which property type is best for them, you can link to the specific post you wrote around that topic on your real estate blog.
Regarding publishing files to SlideShare, click the "Upload" button to find the file you want to share, optimize it for search engine optimization (SEO) by adding a keyword-oriented title and content description, and make it easily findable on the SlideShare network by adding tags to your content. In this instance, you'd want to add tags like "home buyers," "home buyer tips," "home buying," "home buying tips," and "house hunting." And just like that, you've taken up more digital real estate space online (pun intended) and provided another avenue for prospective leads to find out more about your business.
5. Slice up your infographic into images you can use across your real estate social media accounts.


Automating real estate social media marketing shares for your infographic and accompanying blog posts is the next move to make, but instead of sharing the same image for each share and becoming a bit (okay, a lot) redundant with your sharing, slice your graphic into multiple visuals and adjust each accordingly to make them fit the dimensions and specs for each social network. This social media image cheat sheet from Search Engine Journal can give you some guidance when altering images for each social channel.
Assuming you use a content management system (CMS) like WordPress or one built into your real estate agent website, you likely have the option to include a featured image with each blog post. There's usually no one standard size these images need to be, as you can set them to the left, center, or right of your page and include different dimensions as needed, but it's best to make them large enough for blog visitors to read without detracting from your content. For instance, whatever the maximum blog page width is could be the width for your featured image, while the height could be half the height so you're able to show at least the beginning of your article's copy above the fold on the page.
Of course, you can play around with these sizes however you want, but know that consistency is key. It's best for each blog post to have the same featured image format (for example, formatted to the upper-right corner of the post and with a size of 360×200 pixels) than to have random, erratic feature image sizes and page locations, as the latter style could put off readers. Develop a guideline for image use and you'll appease blog readers and find it much easier to use the same design template (whether it be in Photoshop, Canva, or some other tool) over and over to create new images for your articles.
6. Repurpose your infographic into an ebook for home buyers with a slightly modified angle.

Once you've written blog posts for every possible angle and topic included in your original infographic, it's time to kick up your creative marketing a bit further. Ebooks offer your audience yet another new platform to consume your content — and you don't really have to alter your existing content that much to make it fit this new medium. Sure, some new, yet-to-be-explained details are optimal to help differentiate this new piece of content from previous ones, but really you're just packaging up all of that old content and making it easier for your buyer and seller audience to consume.
Software like Keynote (for Mac) or PowerPoint (for PCs), stock images for your ebook (e.g. photos of buyers with their agents inside and outside of homes for sale), and slightly modified copy are all you really need to develop this spinoff content and make it unique in its own right. You can also dress up your ebook with a similar but moderately different design than your infographic to truly differentiate the two. If you need a single, go-to guide to get your ebook off the ground, this blueprint from Fizzle can definitely assist you.
After this new ebook is designed, formatted, and finalized, dedicate an entire page on your real estate website for the content and gate it behind a lead capture form. Those who are actively interested in a home purchase are the ones likely to fill out the form and download the ebook, meaning you now have a means to earn new, well qualified leads you can nurture right after they enter your customer relationship management (CRM) database.
7. Write a short script based on your infographic/ebook you can use to develop a real estate video.
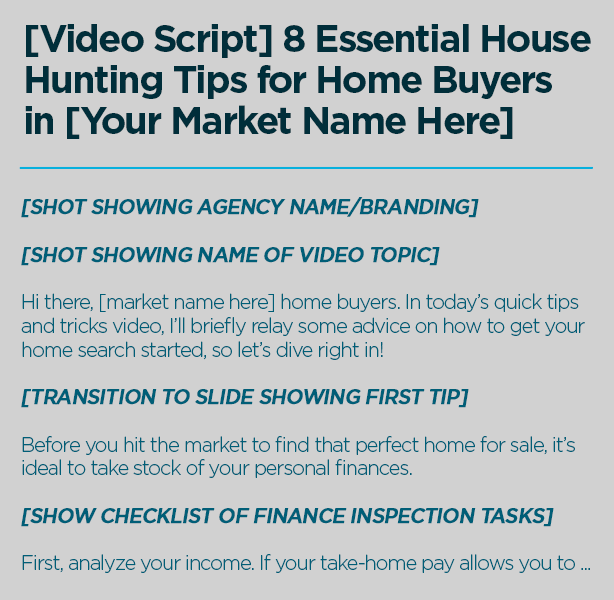
Assuming you already have a real estate YouTube channel for which you post listing and neighborhood tours, client interviews, and other informative videos, you have another avenue for maximizing your original infographic. Whether you use your smartphone, tablet, or a professional camera to capture footage for your infographic-turned-video is up to you, but not every aspect of this recording needs to come from a camera.
By using iMovie, Windows Movie Maker, or one of the other couple dozen free/affordable video editing tools available to you, you can craft slides — not unlike those featured in Keynote and PowerPoint presentations — that can be used in between clips of you speaking to the camera to relay the advice you originally offered in the infographic. Just add in the social images you already created and make them fit the video dimensions for your YouTube clips. Scripting this video should also be relatively easy, as long as you map out each scene beforehand, including the title screen, explanatory slides, and testimonial-style footage.
One of the many great things about using YouTube is, just as with SlideShares, you can add calls to action (CTAs) throughout videos that can link back to your real estate agent website. The trick is not going overboard with these banner and text callouts throughout your videos, as doing so can annoy viewers and prevent them from finishing your videos.
8. Modify that video script to craft a dedicated webinar for your buyer audience.

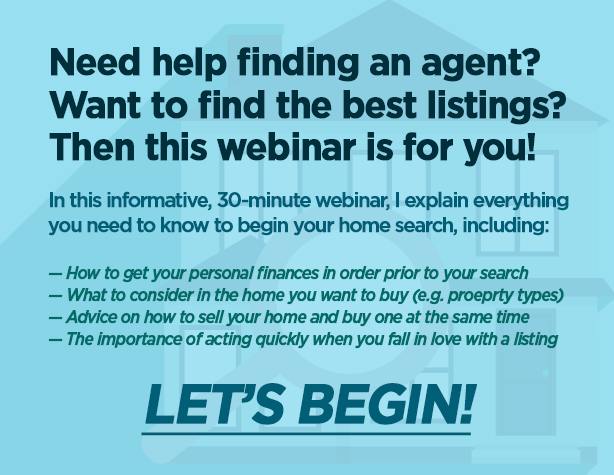
Add a few bullet points to each social media image from your infographic that provide further instruction and direction for your audience and lengthen your video script a bit so you can give examples and additional details based on your original tips and tricks, and boom — you've got a script for your very own webinar.
Webinars have proven to be one of the most effective lead-nurturing activities brands and professionals can undertake for their online marketing, and it's easy to see why. With a dedicated promotion around webinars and a visual presentation that educates and entertains, your webinars can bring in dozens of new leads and allow you to start a conversation with all of them simultaneously, meaning you can further segment your prospects and determine which are most worth your time and effort.
There are several video conferencing tools you can take advantage of for your webinars, many of which allow you to share your screen, start a chat with attendees, and, if you so choose to, talk with them face to face by allowing them to use their webcams. Whichever format you go with for your webinars, prepare them accordingly. For instance, you can get a glimpse of the best days, times, and promotional methods for your webinars in this enlightening report from webcasting tech firm ON24. Also, conduct a test webinar to ensure you have enough content to make it substantial in terms of time and information relayed, but not so long that it could bore attendees and make them leave before it ends.
9. While you're at it, use that same revised script as the basis for a real estate podcast episode.
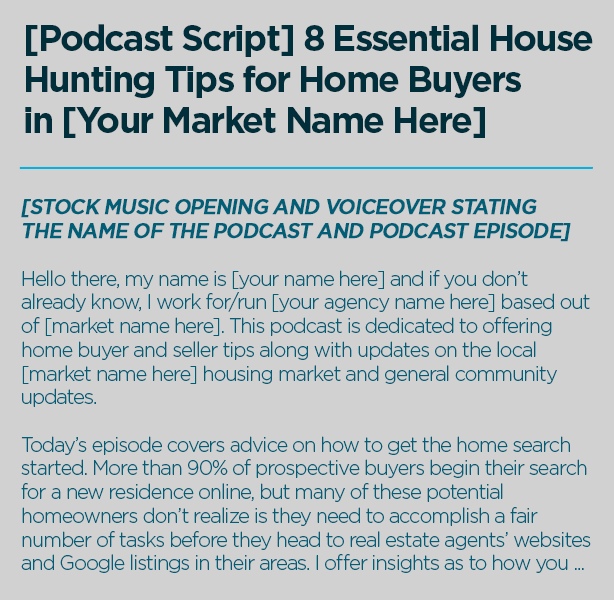
If you don't like the idea of being put on the spot and speaking live to your audience, there's always the podcast route. Instead of talking in real-time to leads, you can record, edit, and otherwise fine-tune a podcast that gives the same information as a webinar, but in a much more structured manner. Listen to some of the real estate industry's best podcasts to get ideas and inspiration for your own podcast, including what kind of subject matter to discuss and how to make yours stand out from the crowd (e.g. stock music in the background, interesting interview subjects).
For this particular podcast based on your home buyer tips infographic, explain in the first few minutes of your podcast episode exactly what you'll discuss, and remind listeners at the start and end of the episode how they can view your other marketing collateral on the topic at-hand on your site as well to get more info.
In fact, creating a blog post for this episode that features a full transcript of what you said (with some minor changes for the sake of SEO) along with bullet points spotlighting your main points discussed can enhance your podcast's reach in terms of organic search and offer another option to consume the content in case your audience doesn't have 20-30 minutes to listen to your episode and instead just wants the main points laid out for them.
10. After creating all of this collateral, put together a roundup blog post featuring links to all of the content.
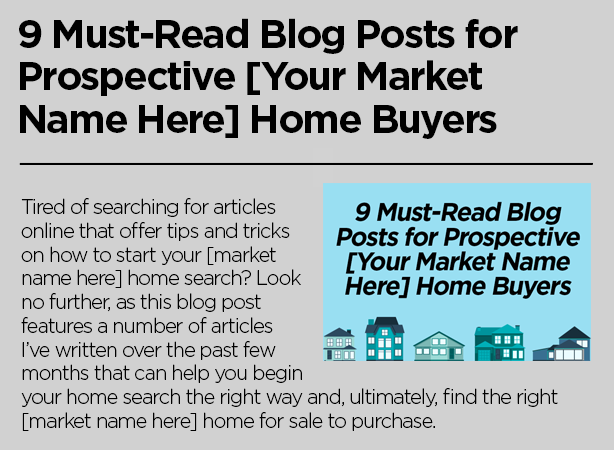
When it's all said and done (literally and figuratively) and you have a dozen-plus pieces of content all based on one simple topic, you have quite the collection of collateral that can come in handy for your home buyer audience. After waiting a couple months (at least) to maximize the efficacy of all of this content, you can complete one more piece that incorporates every single one of these pieces together.
By creating a single page on your real estate website called something like "Home Buyer Resources," you can include snippets of and links to all of this collateral and promote the page via email and social media, referring to it as something grand and encyclopedic like "The Ultimate List of [Your Market Name Here] Home Buyer Resources" or "The All-in-One Toolkit for Home Buyers in [Your Market Name Here]" — something that evokes just how much buyers can educate themselves about the entire purchase process ... and how much you can help them as well.
BONUS: Email Promotion Is an Absolute Must for Each Piece of Content!
Without promotion of any of this collateral, though — particularly through your real estate drip email marketing campaigns — they won't get significant traction and your online marketing metrics will suffer (including lead gen). While creating all of these materials may seem time-consuming in the long run, the pros of publishing each one and alerting your audience to their existence is how you'll reap the benefits at the end of the day.
So, before any of this collateral is produced, audit your email marketing program (or get one off the ground), set up automated drip workflows, and then add messaging for each content type to the drip campaigns (e.g. send leads who download X content on your site email featuring Y content that's similar to the piece they downloaded).
If you're unsure as to where to even find the best email marketing automation systems out there, don't worry: There are several high-quality options that make it simple to set up drip campaigns and allow you to coordinate your outreach efforts for each prospect in your CRM with ease.
These 10 kinds of content are just some of the many types you can create for individual subject matters. What type of content is your favorite to create? Let us know in the comments below!
To view the original article, visit the HomeFinder.com blog.