You are viewing our site as an Agent, Switch Your View:
Agent | Broker Reset Filters to Default Back to ListHow to Customize the Cover Photo of Your Next RPR Report
February 20 2015
 As of January, REALTORS® can now customize the cover photo of their Property, Mini-Property and Seller's reports using either the RPR website or RPR Mobile™. Lets take a look at how you can accomplish this. If you would prefer watching a video, please skip to the end of the article.
Step #1 – Cover photo
First locate the photo you would like to add to the report cover. You can take a new photo using your phone and easily upload using RPR Mobile.
Step #2 – Locate the property
Using the RPR website or RPR Mobile, search the property you will are creating a report for.
Step #3 – Upload the photo
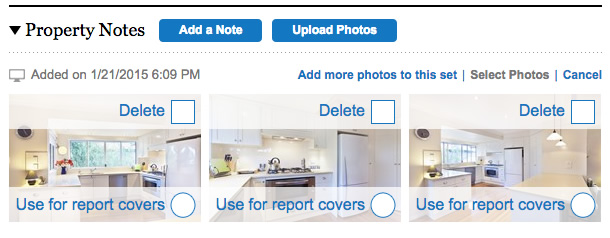
From the RPR Website: From the property detail page, click "Upload Photos" and then "Browse for Photos". Select the photo(s) you want to upload.

From RPR Mobile™: From the property detail page, press "Notes" or scroll down to the end of the page and press "Add a photo." Next you'll have two choices: Take a photo, or select the photo you've already taken from your phone's album. Choose the appropriate option.
Step #4 – Save photo as cover photo
Choose "Edit" and then press the button that reads "Use for report covers." Lastly, choose "Update" to save.
Step #5 – Create your report
The process for creating a report on the website and mobile are very similar. You'll select the "Get a Report" button or "Add a report." Then you will choose your report: Mini-Property, Property or Seller's Report. Next make any desired modifications of what to include in the report and generate the report.
Congrats! You've now customized the cover photo of your report.
RPR Video Learning: If you still have questions on this feature, watch these step by step tutorials how to customize your next report cover photo.
To view the original article, visit the RPR blog.


