You are viewing our site as an Agent, Switch Your View:
Agent | Broker Reset Filters to Default Back to ListHow To Take Listing Photos in Wintertime
February 07 2011
 Wintertime photography can be an intimidating endeavor to say the least. As winter life is really more about getting cozy with a hot chocolate, some popped corn, and a movie or three, it’s hard to get motivated to go out into the icy cold and shoot photos – especially photos of houses.
Can you imagine? Standing outside shivering, trying to take pictures, while people drive by laughing at you from their warm cars… terrible.
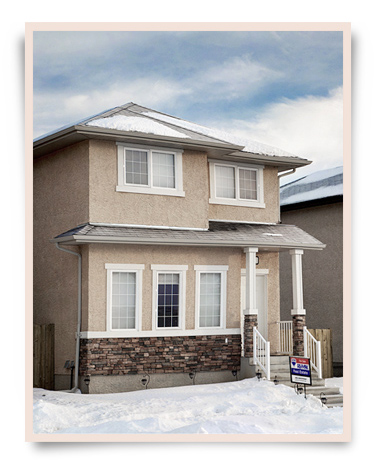
If truth be told though, wintertime photography can be a lot of fun, and the photos you can achieve can be quite stunning. There’s a certain brisk, freshness to winter photos, and snowfall can often create a sense of minimalism adding emphasis to the focal point. I went out the other day, and snapped a quick shot to use as an example:
 As one may expect, wintertime real estate photography involves a bit of practice and often a few editing tweaks to achieve a pleasing final shot. So let’s get started on the tips and tricks.
Timing is Critical
Like all listing exterior photos, I recommend shooting while the sun is rising or setting in the sky. As winter days are shorter in length, and the sun stays lower in the sky, you will have more flexibility than during summer. Aim for days with clear forecasts so you have a better chance of puffy clouds and blue skies. I suggest choosing between morning or evening based on which direction the house faces – you’ll want the light to fall on the front face of the house.
The reason why early/late light is beneficial is because the sky will polarize better, and the low angle of the light will add texture and dimension to the snow. If you go too close to mid-day, the snow and skies will likely overexpose, or appear bland.
Precise Framing/Cropping
How you frame your photo will vary from listing to listing, but always try to make the snow work to your advantage. Think minimalism, and try to add emphasis to the property. Balancing your listing between snow and sky will help hold a viewer’s attention. If you’re unsure, always shoot wide and crop afterwards.
One problem you may encounter is an abundance of dirty snow, especially if your listing is near a busy street or walking path. Try to crop/frame out dirty snow patches as much as possible. If there is a walkway leading up to the house, you can use it to lead the viewer’s attention up towards the property. One other thing worth mentioning, is try not to breath too heavily around your camera. Breath will fog up the lens and soften your focus.
While shooting, play with a few different angles so you have lots to choose from later on. Sometimes a shot looks great in the viewfinder, but only mediocre during the editing stage.
Perfect Exposure
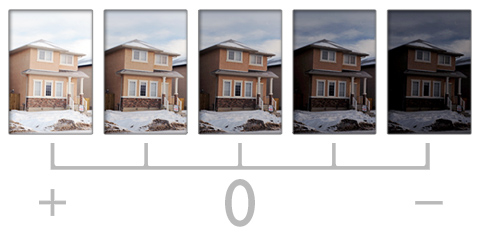
If you have your camera set on JPG mode, then you may want to bracket your photos to ensure that you get a pleasing exposure. If you’re shooting photos in RAW format, they’ll likely have enough flexibility in exposure to attain the shot you want from a single file, but bracketing can be a safe bet nonetheless.
Most camera’s have a bracketing feature built in so that you can quickly obtain three or five shots of the same scene at different stops (exposure levels) with ease. If your skillset is advanced, I suggest using a tripod, so you have the ability to blend the exposures using exposure fusion or HDR techniques later on.

If you’re eager to try blending exposures, I suggest using PTGUI Pro ($113 US) for exposure fusion, or Photomatix($99 )for HDR. If you prefer using free software, then I suggest Enfuse GUI for exposure fusion, or Picturenaut (Windows only) for HDR. I’ll talk about the differences between each in a future post.
Fine-Tuned Edits
There are only three main edits that need to be performed on a wintertime photo: color, contrast, and levels – preferences will vary, so take my recommends as a guideline only.
When I’m editing a winter shot, I like to push my highlights (snow, clouds, etc.) very close to the point of overexposure. My intent is to have very pure looking snow with a slight cool blue tint. Adding contrast will increase the subtle texture in the snow, and emphasize features on the listing. Always aim for realistic color, but if you have to choose between cool and warm tones, go with cool. If possible, try to counteract the cool tone of the sky and snow with a bit of warmth on the house. The final image should look like a cozy home just waiting to be lived in.
If you have a few wintertime beauties that you’d like to share, feel free to add them to our Flickr photo group. Or feel free to add any additional tips, or ask questions in the comments area below. Happy shooting!
If you would like to learn more about Point2 Agent technologies, please click here.
- A Tutorial To Help Straighten Listing Photos
- Correcting Barrel Distortion
- How to Shoot Listing Photos at Dusk


