
RETECHNOLOGY PREMIUM MARKETPLACE RELATED PRODUCTS | WEBINARS | SPECIAL OFFERS


You are viewing our site as an Agent, Switch Your View:
Agent | Broker Reset Filters to Default Back to ListA Step-by-Step Guide to Building Spot-on CMAs
May 23 2021
 As a REALTOR, your clients hire you for many reasons: your experience and expertise, educated guidance and advice, your local market knowledge, and help guiding them through the process. One other big reason is your ability to price a property. That's where knowing how to put together a solid CMA comes in.
A CMA (comparative market analysis) is a process agents use to establish home values and set listing prices.
You create CMAs by looking at comps (short for comparable properties). These comps are similar properties, mostly in the same neighborhood, and tend to have the same square footage, number of bedrooms and bathrooms, features, upgrades, etc. You want to compare things that are equal, or at least as equal as possible, to help price your listing.
Creating a spot-on CMA is crucial to your skills and success. Here are step-by-step instructions on how to do it in RPR.
How to Create a CMA
Start at the RPR homepage by visiting narrpr.com. Then switch the toggle to "Residential" and type the address of your subject property. If you don't have that, RPR will also search by APN.
Once you've executed your search, you'll arrive on the Property Details page. Under the property map/photos, you'll see the Realtor Valuation Model® (RVM®).
The RVM estimates displayed in RPR are the product of multiple Automated Valuation Models, each uses proprietary algorithms and arrives at its own estimate. The analytic goes beyond the traditional automated value by incorporating listing and sales data into the equation. The RVM can be a great starting point for pricing discussions with clients.
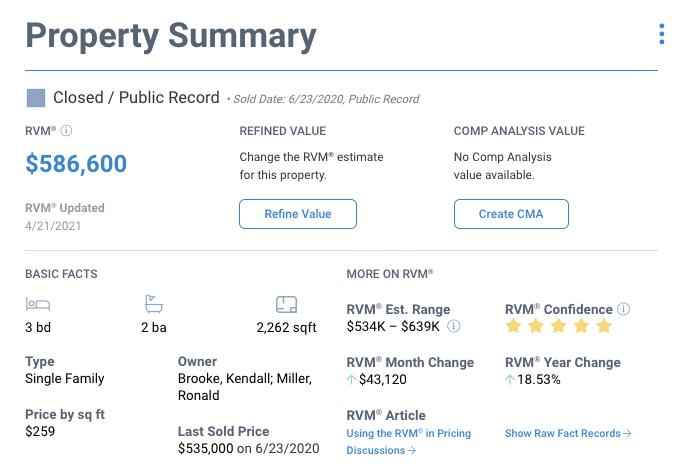
The RVM is accompanied by a 5-star Confidence Score. A confidence score of 5 indicates that the different automated valuation models yield similar estimates for this property.
Building Your CMA
Now let's move on to the CMA to further determine the price.
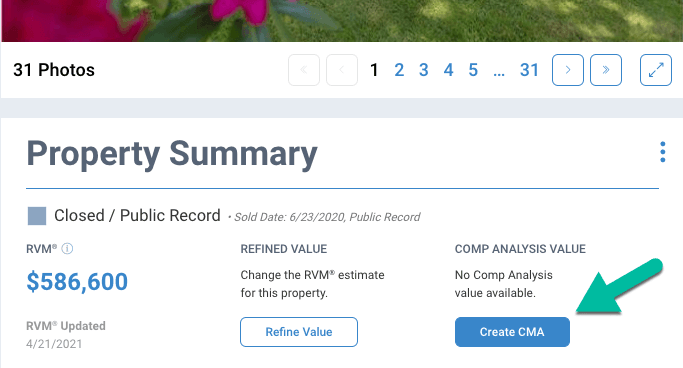
From the Property Details page, click Create CMA.
You'll arrive at the CMA tab with a 5-step wizard to guide you through the process.
In the first step, press the blue Confirm Facts link on the CMA page. This is where you'll confirm the basic property characteristics for your subject property such as living area and number of rooms. These characteristics will also be used in the search for comparable properties in the next step. The facts you change are highlighted in blue. Once you've made your changes, select Confirm Facts & Close.
A checkmark and confirmation will appear where you've completed the first step.
Searching for Comparable Properties
Otherwise, select the second radio button, Search an area for several properties, to enter the search criteria for our comparable properties. You'll notice the criteria auto-populates based upon the subject property's characteristics, but you can easily change it to meet your needs. Narrow your search based on sales timeframe, property status (active listing, off-market, recently sold), distressed status, beds, and baths or living area, and many other parameters to really fine-tune your search.
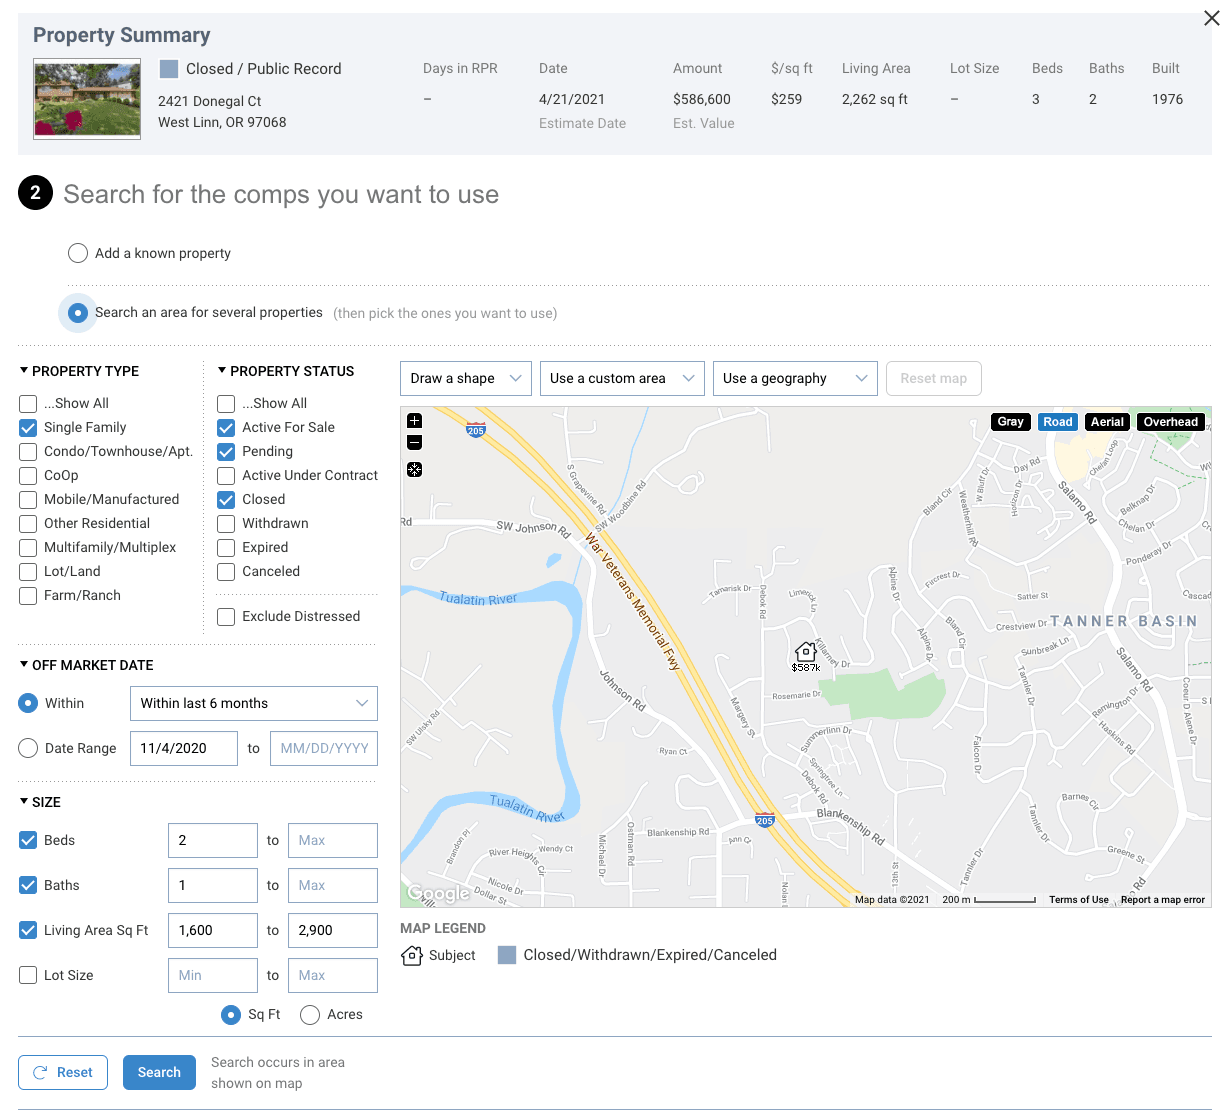
To add geographic search restrictions, use the search tools directly above the map, such as Use a Custom Area or Use a Geography.
After choosing Search, the results will be displayed below the map. Comps returned in this search that were also used in the RVM® calculation are flagged with a blue star, but are not weighted differently than any other comparable property.
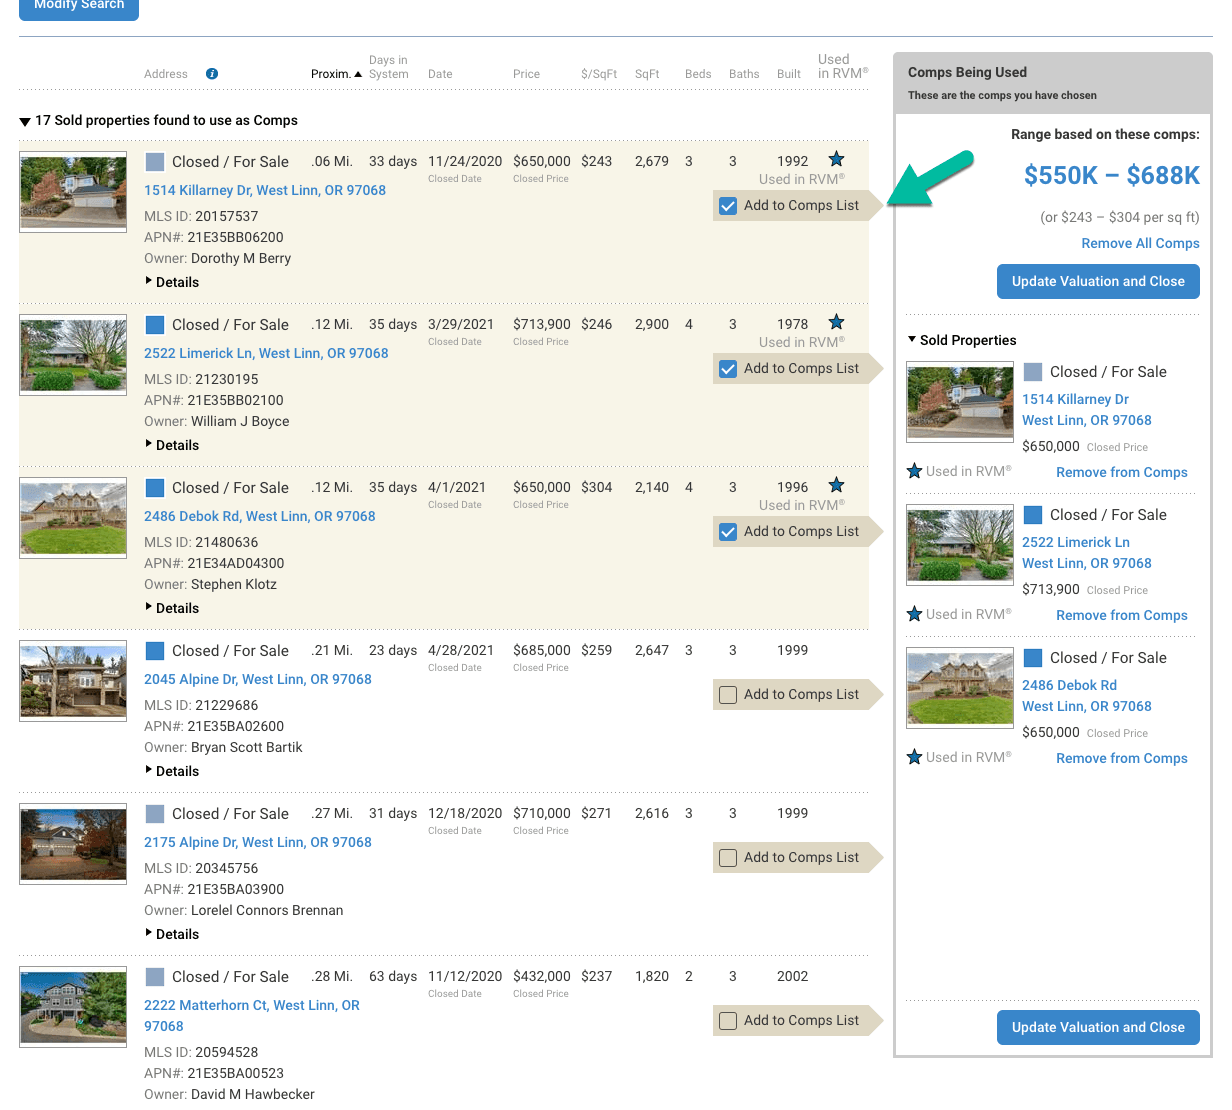
Now check each of the properties you want to include in your analysis. As you select each comparable property, it will be added to the list of selected comps in the sidebar.
Once you are satisfied with your comp selection, choose Update Valuation and Close.
The average price of your comps will appear at Step 2, with the ability to edit if you want to make any changes to your comp selection.
Make Adjustments to the CMA
Next we'll adjust the comparable properties as they relate to the subject property. Here the comps you selected are presented in a grid. Specify which order you'd like them to appear in your reports. Choose from the dropdown to change the order.
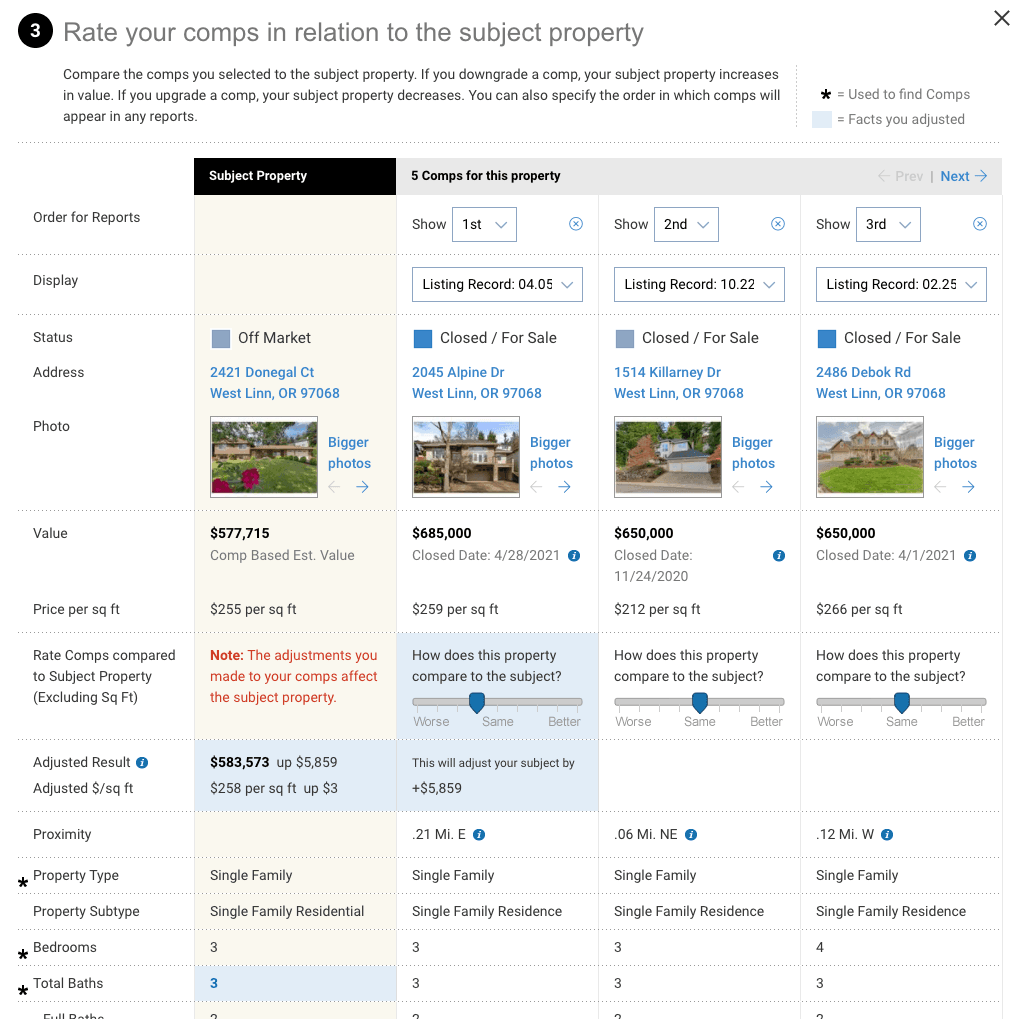
These sliders allow you to rate each comp relative to the subject property. Decide whether the property is worse, the same, or better than your subject property. Your changes are previewed on this page, so you can see their effect before you complete them.
Select Update Valuation and Close once you are done with your adjustments.

Your adjustments will now show on Step 3, with the ability to edit this result, if you choose.
The final step before generating the Seller's Report is to review the results of your analysis. If needed, you can override the supplied valuation. To do that, simply enter your own value or round the suggested price up or down. Also, choose to keep the value range, or edit/remove altogether. If you bypass this step, the comp analysis result from step three will appear in your report. The result will also appear on the Summary tab of the Property Details page. If you complete step 4, the new value and range will appear in those locations.
Create Your Seller Report
Now you're ready to generate the Seller's Report. Select Create Report to be directed to the Reports Generation page.
The Seller's Report showcases the subject property, condition of the local market, comparable properties, and pricing strategy.
Select the "+" symbol to expand the report details section. Now choose which elements to include or omit in the report based on your seller's specific needs. For example, you may choose to suppress the estimated value for the subject property and/or the estimated value for the comparable properties.
Next, on the right side of the page, choose which cover page elements to include. Now personalize your report if you intend to send this directly to your client.
Choose your delivery method and select Run Report.
Now you have a perfectly priced property with the best deliverable to send to your client! As you can see, RPR can really help you in determining property valuations and creating killer CMAs.
Watch the Video! Pricing a property with RPR
To view the original article, visit the RPR blog.