
RETECHNOLOGY PREMIUM MARKETPLACE RELATED PRODUCTS | WEBINARS | SPECIAL OFFERS


You are viewing our site as a Broker, Switch Your View:
Agent | Broker Reset Filters to Default Back to ListGoogle Search Console and Your Real Estate Site: Part 2
May 12 2020
Google Search Console is where the answers to many of your SEO questions can be found! The Search Console suite of tools helps you monitor, maintain, and troubleshoot how your site performs in Google Search results.
Before you dive into Part 2, if you haven't yet, check out the first half of our series so you're set up for success and Google can start indexing your site.
If you did read (or watch) Part 1, then you're ready! You now know Google Search Console offers a ton of crucial information about your site and you know it's FREE! You also learned:
- How to create your CName
- How to add your site and verify ownership
- How to submit a sitemap
So, now that you're taking full advantage of this free suite of informative tools and receiving valuable feedback about how your site performs in Google Search results…
It's time to check your work.
It's worth noting that the second part of our Google Search Console series is a little more technical than the first. But just remember, you don't need to understand code or HTML to utilize Search Console. You simply need to spend some time thinking about how your site is organized and written, and you must be willing to make some changes.
How do you know which changes to make? That's where Reports come in!
Let's start with the Sitemaps Report…
You can check the Sitemaps report to see about any sitemaps which you have submitted for your property. Keep in mind, this report won't show any sitemaps discovered through a robots.txt reference or other discovery methods.
If you're an IDX Broker client, you should have at least two sitemaps – one for your domain and one for your CName (as discussed in Part 1).
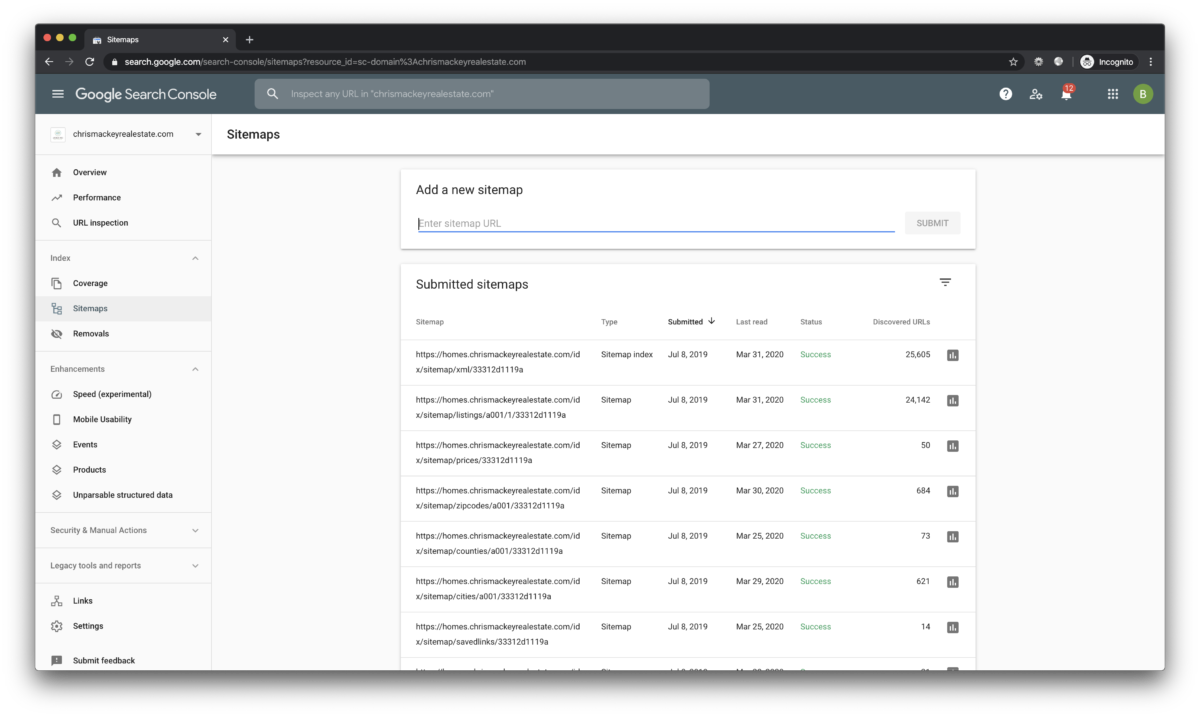
The Sitemaps report shows your sitemap submission history, any errors that Google encountered when analyzing your submitted sitemaps, discovered URLS, the status of the crawl (i.e. Success, Has errors, Couldn't fetch), and more.
You only need to consult this report after submitting a new sitemap to make sure the submission was successful.
Next, let's look at the Index Coverage report.
"Indexing" is the process of adding web pages into Google search.
Google crawls your pages to compile a massive catalog of all the words it sees, plus their location on each page. Google then indexes these pages so they can show up in the correct, most relevant search results.
The Index coverage report gives you an overview of all the pages Google has visited or tried to visit.
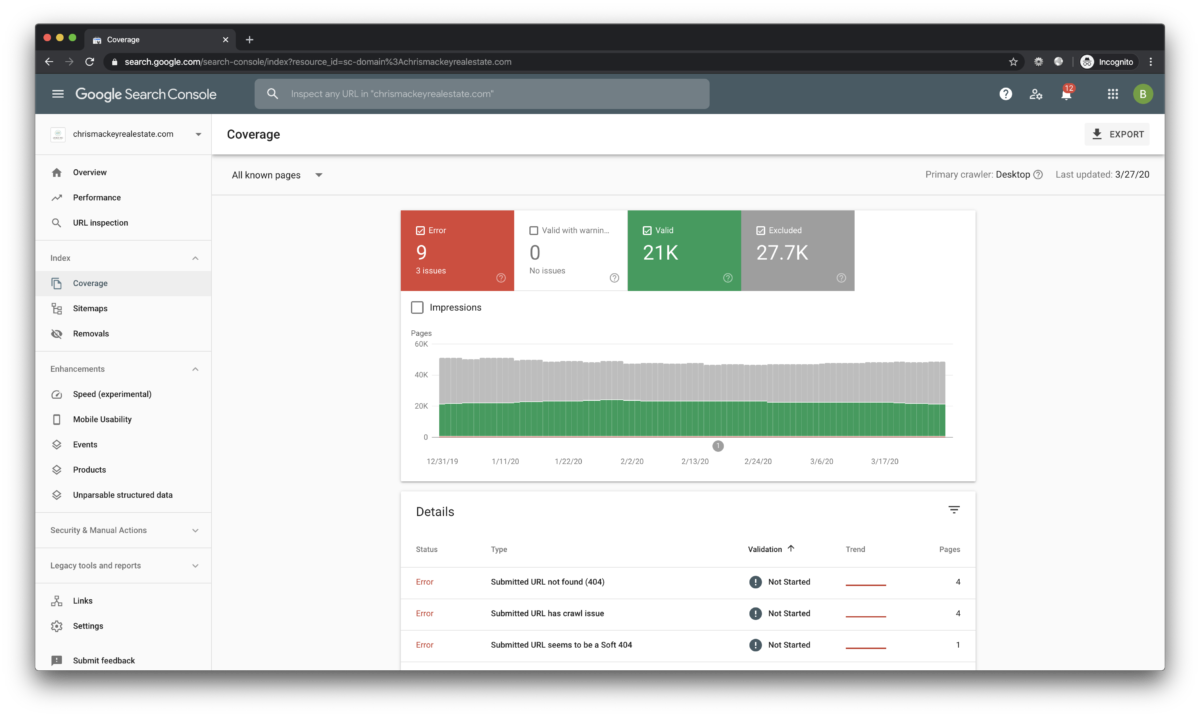
The main page in the report groups your URLs by status. Potential statuses include:
Error: the page isn't indexed, meaning it will NOT show up in search results. There are several reasons for this, such as pages responding with 404 errors. Common errors for a real estate site could include pages for a listing that has gone off the market, or a page for an open house which has since passed. Or there is the chance the page was "not found" by mistake, and in that case, we can request re-indexing!
Valid with warnings: These pages may or may not be shown in Google search results, depending on the issue. This status basically means that this is an issue which Google thinks you should look in to. A good example is mobile usability issues.
Valid: The page is indexed – no need to do anything! A page can be indexed whether submitted by your sitemap or not. For example, if you're an IDX Broker HOME client, by default, every new WordPress post and page is indexed. Though keep in mind, when you add new content, it can take a few days for Google to index it.
Excluded: These pages are excluded from search results – whether by your choice, or Google's choice.
If you're interested in drilling down even further into the coverage report and interpreting your data, Onecrawl has a great introductory article.
We recommend checking the summary page of the Index Coverage report every once in a while. Your Valid pages trend should remain steady with a gradual increase as your site grows. If you see drops or spikes, it's time to troubleshoot.
This brings us to the URL Inspection tool.
When troubleshooting errors and issues on specific pages, the URL Inspection tool is one of the most important tools you can leverage! It offers the best visibility into why certain pages may not be appearing the way you want in Google search results.
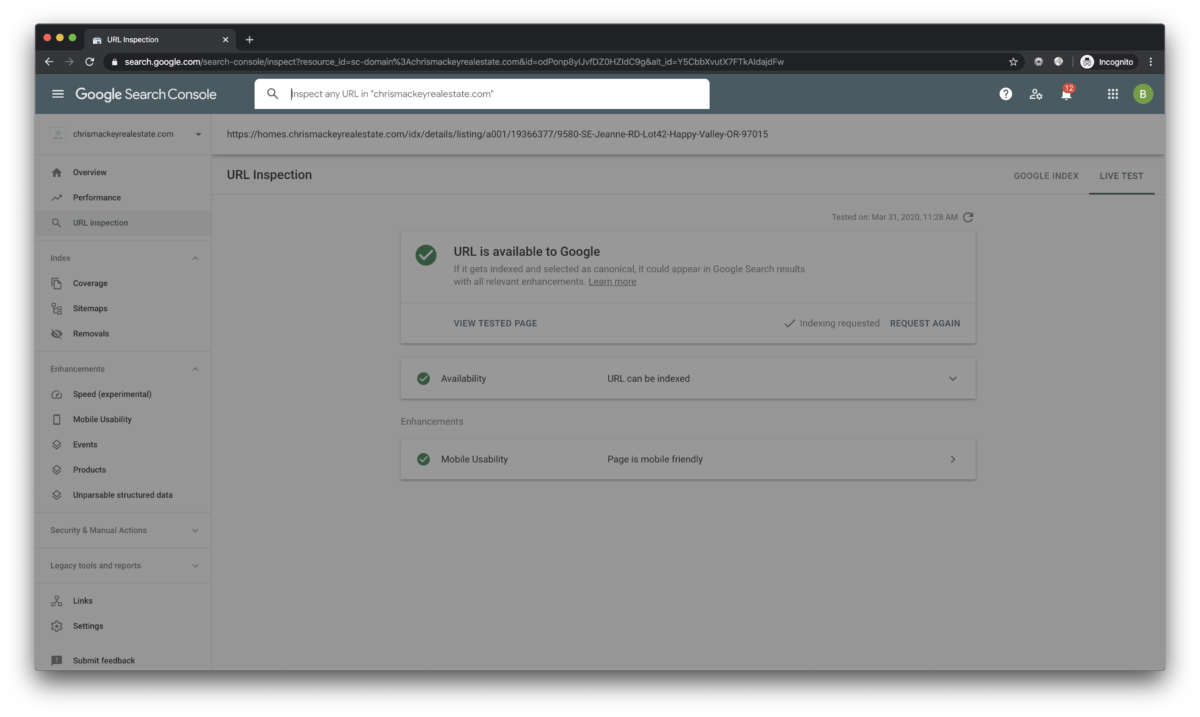
You can access this tool from the Coverage Report, the top navigation, side navigation… or really anywhere you see a little magnifying glass next to a URL! Copy/paste the full URL you want to inspect into the search box and press Enter.
You'll see three different sections:
- Presence on Google: This section describes whether or not the URL can appear in Google Search results – similar to the information in the Coverage report.
- Coverage: This section describes the index status of the URL and the details of the indexing process. You can learn where and how your page was discovered (e.g., via sitemap), as well as a Referring page – a page Google possibly used to discover this URL. You can also see when your page was last crawled, or conversely, if Google couldn't crawl your page.
- Enhancements: This section describes any Search enhancements detected by Google on your URL the last time it was indexed. If the URL couldn't be indexed, or no enhancements were detected, this section will be empty. The most relevant "enhancement" for a real estate site is Mobile Usability.
We suggest visiting the Help Center for more information on each section.
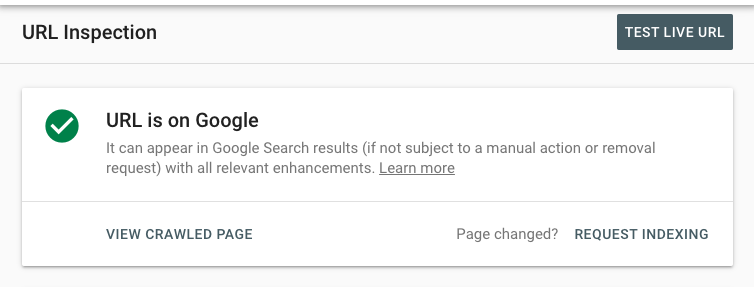
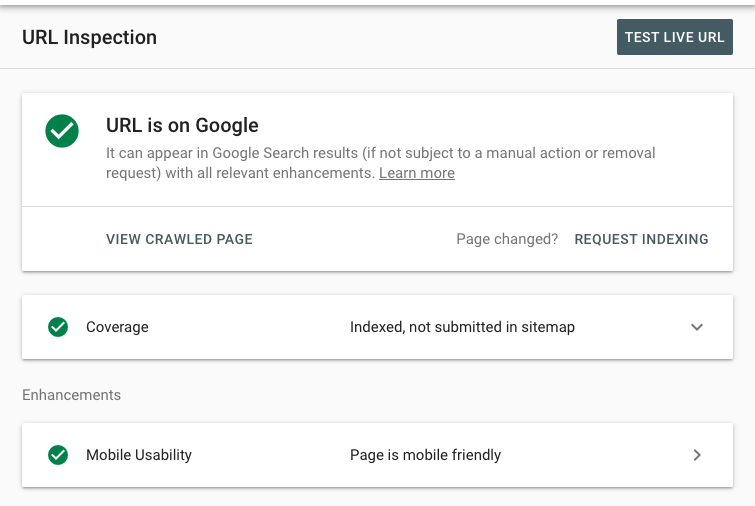
After you've reviewed the three sections above, you have three main actions to take:
First, you can click "Test Live URL" to see if the page can be indexed by Google. The test will run instantly. This is a great way to see if your page has been fixed once you have made any necessary changes to it.
Second, you can request (re)indexing. Once you confirm you have fixed any errors, or (maybe) you don't think there were any errors to begin with, you can request that your inspected URL be (re)indexed by Google. Simply click "Request indexing" on the inspection result page for the URL. If the page passes the quick test for immediate indexing errors, it will then be submitted to the indexing queue. Indexing can take up to a week or two, but you can always check the progress using this tool. Keep in mind that you cannot request indexing if the page is considered to be non-indexable in the live test.
Third, you can see more information about the tested page by clicking "View Crawled Page."
The URL Inspection tool is one of the most important in your tool box, so use it often!
Next, let's explore the Performance report!
The Performance report offers valuable information about how your site performs (as a whole) in Google Search results (as opposed to your individual site pages).
The information in the Performance report is divided into four measurable metrics of data:
- Impressions: the number of times your site appeared in search results.
- Clicks: the total number of times users clicked from search results to your website.
- Average click-through rate (CTR): the percentage of impressions which resulted in a click.
- Average position: the average position of your site in search results.
You can then filter your metrics by Dimensions. Dimensions are the attributes of your data. They usually describe WHO did something or WHERE it happened – such as location of query, or device type with your results.
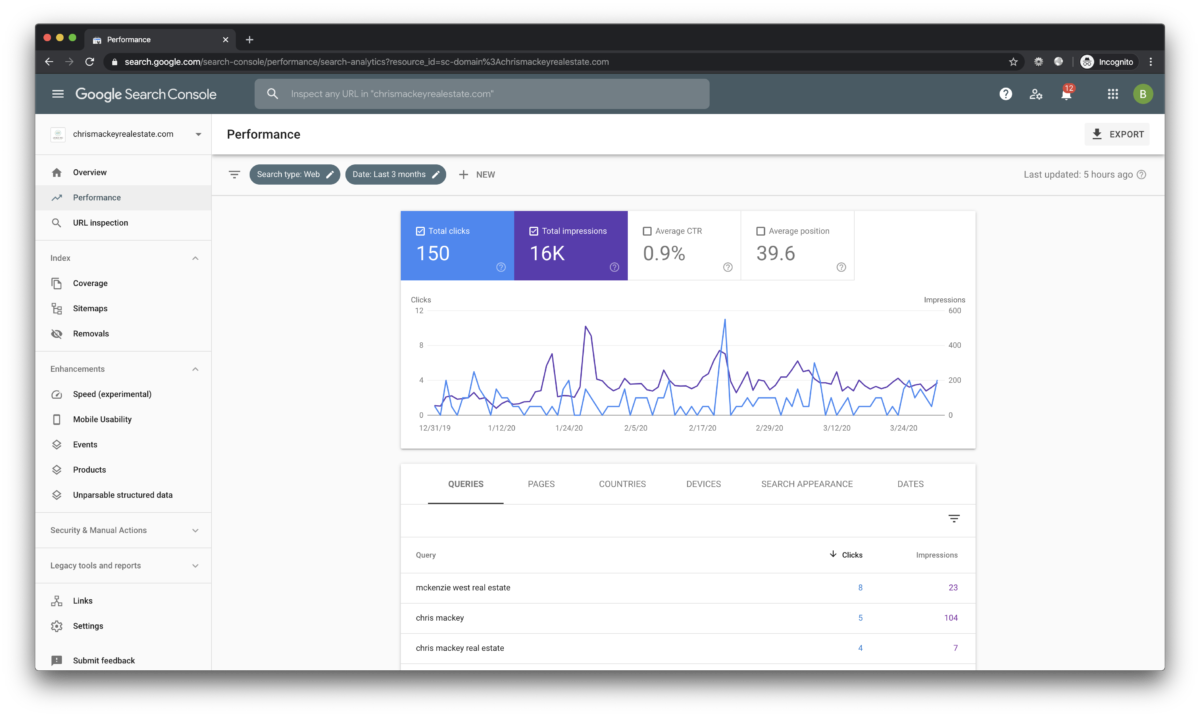
The performance report is built out of three main elements. In order (from the top down), they are:
The filter bar – This element is above the chart, towards the top of the page. The filter bar allows you to filter your data to include only what you need in reports. For example, for a local real estate site, you probably don't need to include criteria from all countries. Click "+ NEW" to add an additional dimension to your data. Select Country, filter by United States, and Apply.
The chart – This is the most visual element. The most important thing to know about the chart is that you can choose which metrics you want to see. At IDX Broker, we typically focus on Total Clicks and Total Impressions. In order to see trends for the other metrics, just click to add or remove them from the chart and the table.
The table – The table element allows you to break down your metrics according to possible dimensions – queries, pages, countries, etc. Simply click each of those dimensions to see a table with the corresponding metrics. For example, if you click "Devices," you will see what type of device the searches for your site came from – Desktop, Mobile or Tablet.
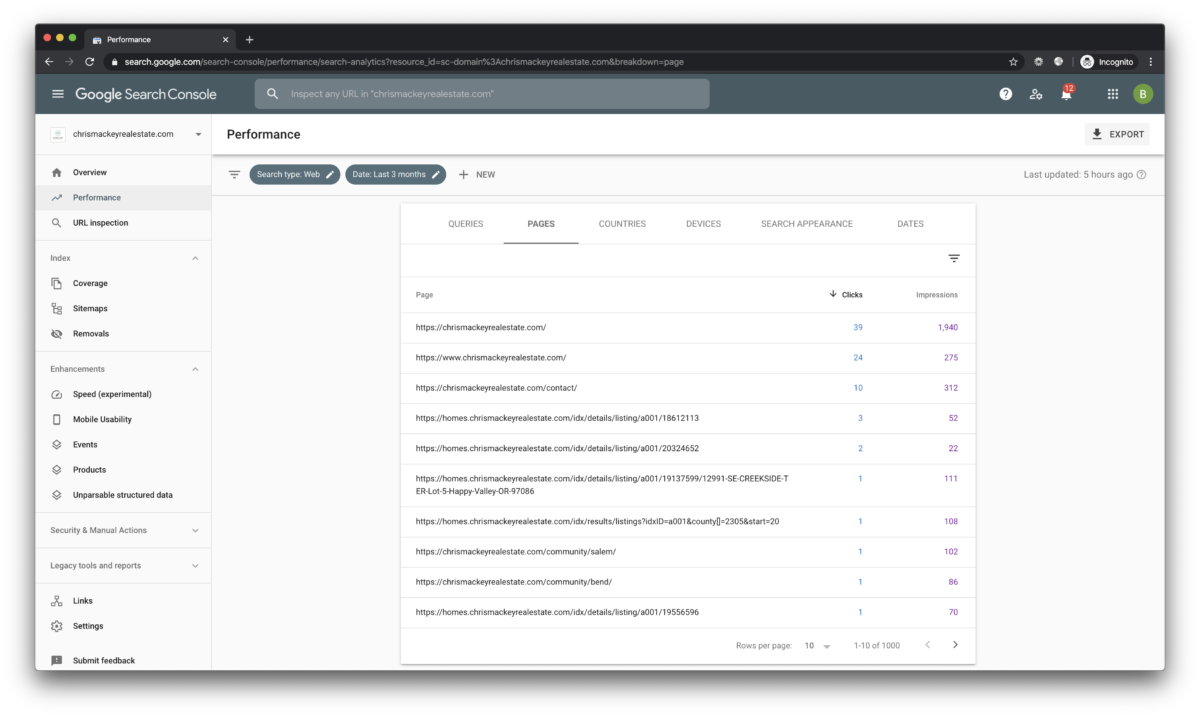
When analyzing the performance data of your real estate site, the most important dimensions of the table will be Queries and Pages.
You'll likely run into a few common, but easily fixable, issues:
- First, look for low click-through-rates. If your number of impressions is significantly higher than your clicks (a.k.a you have a low CTR) for a specific query or page, you should create better titles and descriptions for your pages in order to make them more attractive in search results.
- Also, look for missing search queries. There are likely certain keywords or queries where you would expect to see for your site – such as "Open House," "For Sale" or highly localized search terms like "Springfield Golf Course Homes." If these queries don't appear, you may not have enough relevant content. We suggest you add Saved Links, create community pages or write blog posts on the subjects where you may be lacking.
- Finally, look for missing pages. If important pages on your site are not in the pages list, there might be an issue with them. In that case, you should use the trusty URL Inspection tool to find out why!
Check your Performance report periodically and use this information to improve your site's search performance!
And, finally, let's look at the Overview Page.
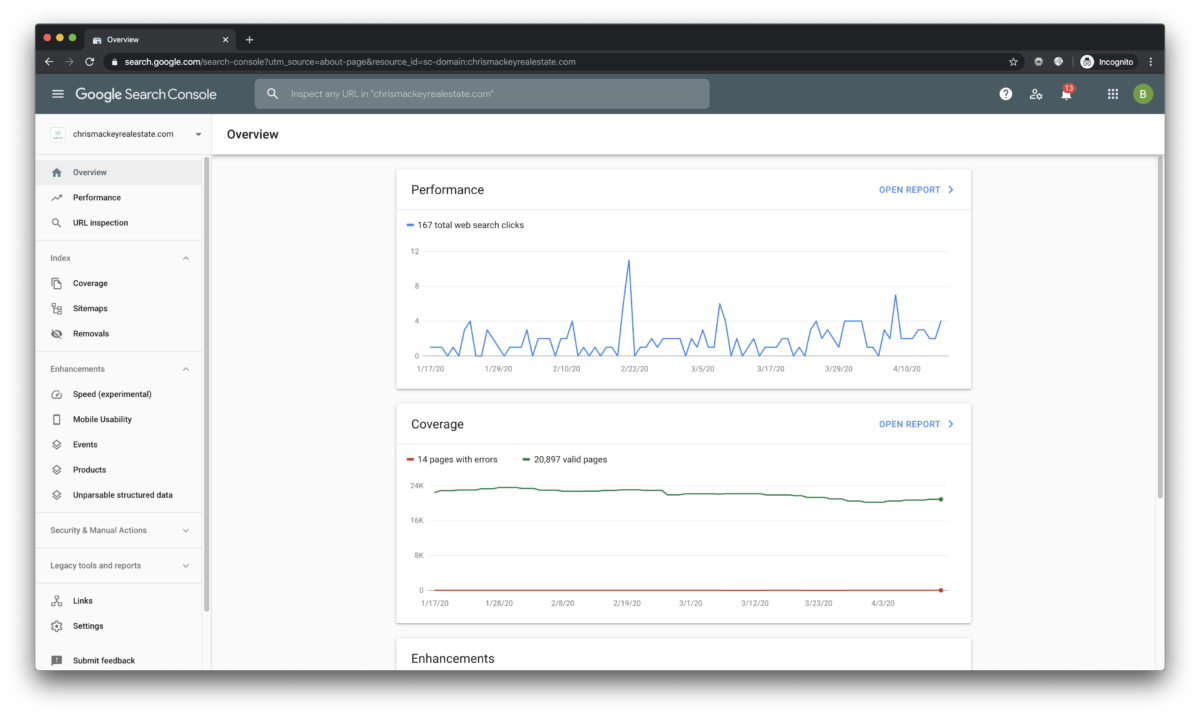
If nothing else, every month or so, you should take a look at your Search Console Overview page. This is the simplest way to get a quick, yet comprehensive health check on your site. Use your overview page to see a summary of the most important data mentioned above, including performance, index coverage and enhancement metrics.
As you explore and evaluate the information in Google Search Console, you will identify what parts of your real estate site are the strongest, which ones need improvement, and overall you'll gain a better understanding of your site's performance. That's why we use it every day!
We hope you found this series helpful! We encourage you to take what you learned and apply it to your real estate business to help you stand out in Google Search Results!
To view the original article, visit the IDX Broker blog.