
RETECHNOLOGY PREMIUM MARKETPLACE RELATED PRODUCTS | WEBINARS | SPECIAL OFFERS


You are viewing our site as an Agent, Switch Your View:
Agent | Broker Reset Filters to Default Back to List14 Easy Real Estate Photography Tips
October 09 2019
The old cliché "a photo is worth a thousand words" is nowhere more true than in the world of real estate listings. And forget words, really: We're talking dollars and deals here!
Nothing pulls buyers to open houses like stunning real estate photography. That's why it's so important to think of property photography as an investment. The more buzz you can build around a listing, the more competition you're going to drive.
The photos are what's helping prospective buyers decide whether a listing is worth seeing in person. Photos will get them daydreaming about setting up their life in the house before they've even stepped across the threshold.
And photos are what buyers are going to be looking at later, when they're back at home — pondering second visits and offers, maybe thumbing through a whole stack of flyers and brochures from a day of open houses. And beyond that, the best real estate photography also impresses your sellers and further wins them over as clients.
Here's how to take your listing photos to the next level:
1. Hire a professional if it makes financial sense.
 Real estate photography pricing is going to vary a lot depending on how you go about it. True, smartphones can take a great photo these days, but this may not be an area where you want to skimp.
A professional photographer is going to know how to capture a house in its best light (literally). They'll have equipment and skills you may not. They can arrange drone photography and take care of editing. If professional photography seems too expensive, make sure to weigh it against the costs of investing in equipment and editing software you'll need to do on your own.
2. Take a photography class.
If you think you'll be taking a lot of your own real estate photos, it makes sense to invest in yourself. Consider taking a digital photography and editing class. Make sure you have Photoshop or another editing program and know how to use it. Find out if the agents you work with have access to a drone for smooth home tours and aerial photography, and, if not, consider purchasing one or going in on it together.
3. Take photos with buyers in mind.
Ask yourself who are you marketing to, specifically, and what kind of photos are going to entice them to take the next step? Think about the little calculations buyers make in their heads when they consider a new home: Is there enough storage? How is the natural light? Where might an extra guest sleep? Where might the kids play? Make sure your photos answer those questions in an appealing way.
4. Start by cleaning and decluttering.
Work with sellers to clean, declutter, and remove personal items. Ideally, most of their belongings can be out of the house in storage or boxed up in a basement. Make space for potential buyers to imagine their own lives in the space.
That said, getting the best picture you can of a cluttered bathroom or kitchen might be better than not including a photo at all. Your fellow agents might advise buyers that no photo of a bathroom or kitchen is a bad sign. Get our tips on sprucing up a house to sell here.
5. Stage the home.
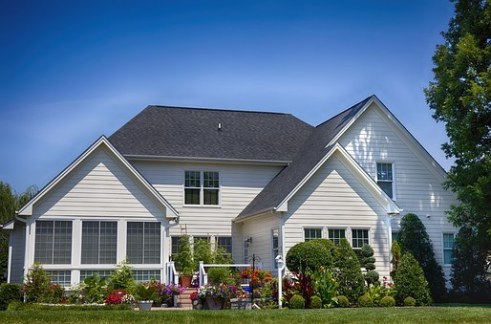
 Staging isn't just for open houses! Before you schedule your photo shoot, make sure the house is staged if your sellers have already moved out. Pay attention to the details and remove anything strange or distracting. Take care to increase the curb appeal as much as possible, too.
6. When taking the photos, remember to capture the space, not the stuff.
If you're working with a home that isn't fully cleared out, take the photos from angles that avoid the seller's belongings as much as possible. And if you have staged the house, remember: You're not selling that nice clean furniture. Even if you're proud of a couch you brought in, you don't need to capture the whole thing in your photos. Getting a good angle on the full living room floor space should be a higher priority.
7. Feature photos of great attractions around the neighborhood, too.
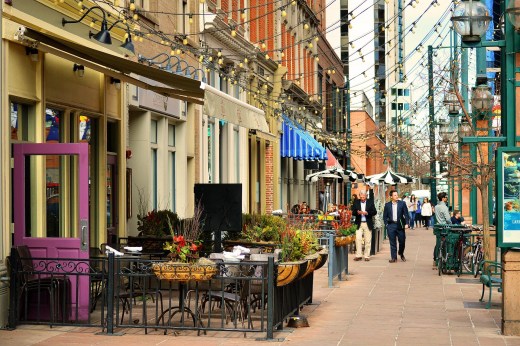 When people buy a home, they're buying the lifestyle that comes with that location. If the house is near a lake, make sure there's a photo that captures the house and the lake together. If the home is a quick walk to a cute cafe or pizza place, consider pulling in a shot from around the neighborhood.
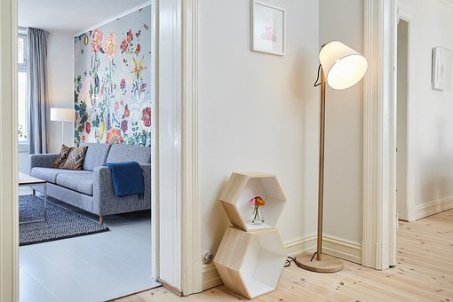
8. Prioritize the lighting.
Choose a time of day with great light. The best time of day for property photography varies depending on the home's orientation, so you may need to do a little research or trial and error.
Make sure all blinds are open and windows are clean so natural lighting can enhance your photos. Be careful with turning the lights on because it may create unwanted shadow, cast odd colors across the flooring or create a glare in the windows.
9. Use landscape orientation to maximize visibility.
When potential buyers look through listing photos, they're not just trying to see the rooms: They're also trying to get a sense of how the rooms fit together. They want to know what it would feel like to be inside the house. Use landscape orientation to give them the best view.
10. Use a wide-angle lens.
Use a wide-angle lens so you're capturing as much of the flow of the house as possible. You can also emphasize the spaciousness of certain areas. But, be careful not to distort the size of a room too much.
You want to make sure buyers feel excited when they actually do walk through the door – not disappointed because the living room looked five times bigger in the pictures.
11. Take advantage of drone photography.
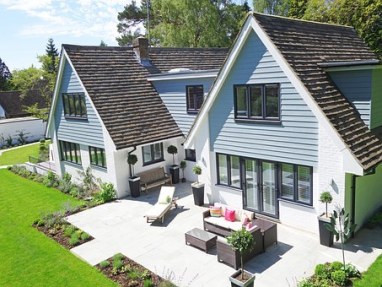 With a drone, you can get an aerial shot of the home to showcase its footprint, its yard, or its proximity to a great park or lake. You can also use a drone to take a really smooth video of the interior, enabling prospects to take a virtual tour of the house.
Pro tip: Make sure it's okay to use drones in the neighborhood. There are sometimes local restrictions on drone usage, depending on where the listing is located.
12. Make sure you edit your photos.
Photo editing is the phase in which you can take steps to bring out the best in the property. You can balance colors in the image, smooth the picture out through "noise reduction," play around with the contrast, resize and crop the image, and a whole lot of other things according to your needs and skill level.
You'll need Photoshop or another photo editing product to be able to edit effectively, or ask a professional for help.
13. Give yourself plenty of time to get the shooting done.
You'll want to be able to take lots of photos and practice until you get the shot that looks best – while the lighting is good. Don't make a habit of relying on last-minute photos: Start early so you can return to the home multiple times if you decide you need more pictures.
14. If done correctly, less is more.
You do want to make sure you're showing off every room of the house, but giving buyers a nicely curated selection of excellent photos is going to make a more appealing impression than just uploading a hundred shots that cover similar angles.
Give them a reason to show up at the open house so they can zoom in on that closet or marvel at the kitchen backsplash with their own eyes.
To view the original article, visit the Homesnap blog.