
RETECHNOLOGY PREMIUM MARKETPLACE RELATED PRODUCTS | WEBINARS | SPECIAL OFFERS


You are viewing our site as an Agent, Switch Your View:
Agent | Broker Reset Filters to Default Back to ListTop 10 Real Estate Photography Tips
May 10 2019
Want your listing to appeal to as many potential buyers as possible? Make sure you listing photos are as good as they can be.
In this article, BoxBrownie founder Brad Fillponi shares his expert tips and tricks to nail those all-important shots. By following these simple steps, you can ensure you are showcasing everything your listing has to offer in your photos.
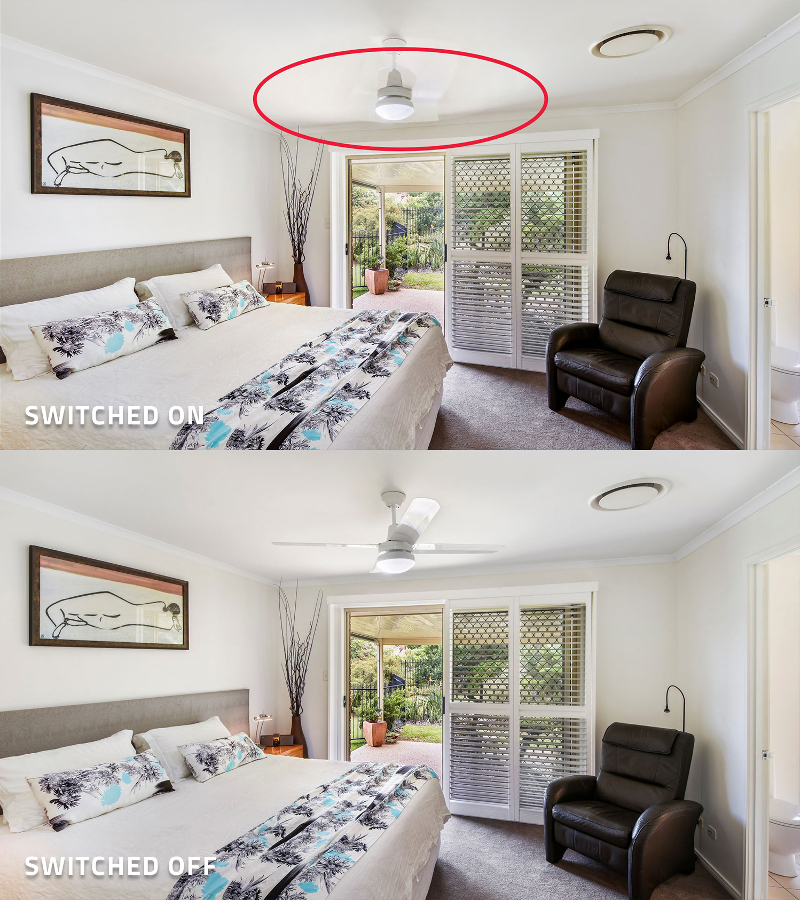
1. Turn Off Fans
You want to show clients exactly what is being included in the sale. So unless desired in the shot, in motion fans both internal and external should all be switched off when taking photos.
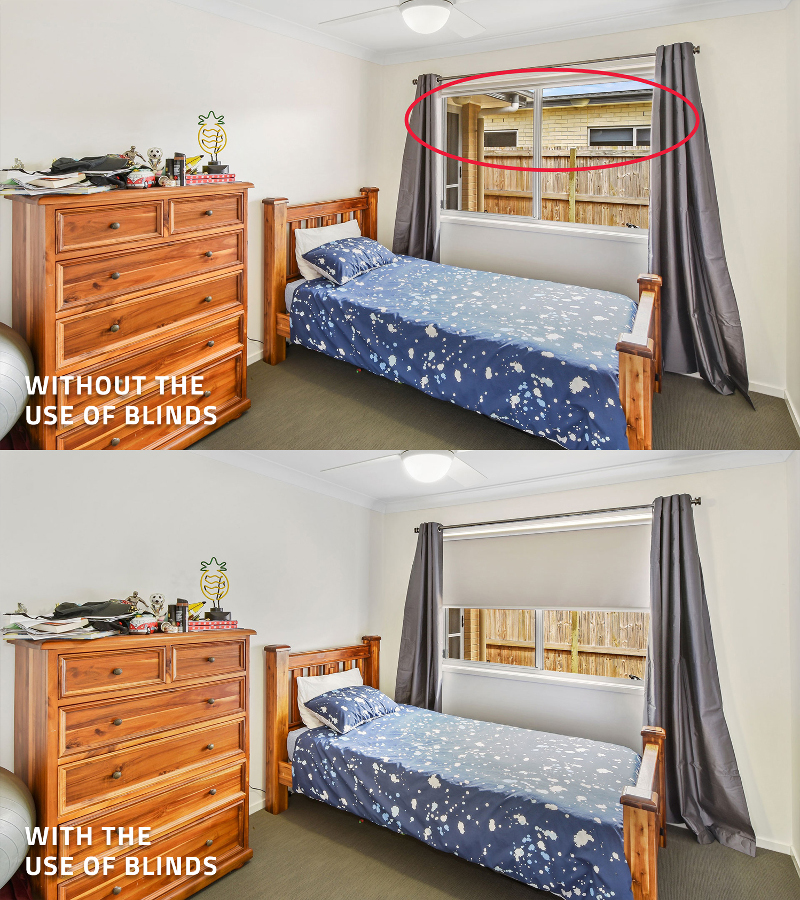
2. Hide Neighbors with Blinds
This is your secret weapon for creating privacy and hiding the view of neighbors. By pulling the blinds down far enough to cover the adjacent property, you are still displaying the external view without showcasing the home next door.
3. Don't Include the Gutter
You don't want an ugly gutter to ruin the hero shot of your property. You can avoid this by taking a step closer towards the property, therefore cutting off that unwanted item in your image and keeping the focal point on your listing.

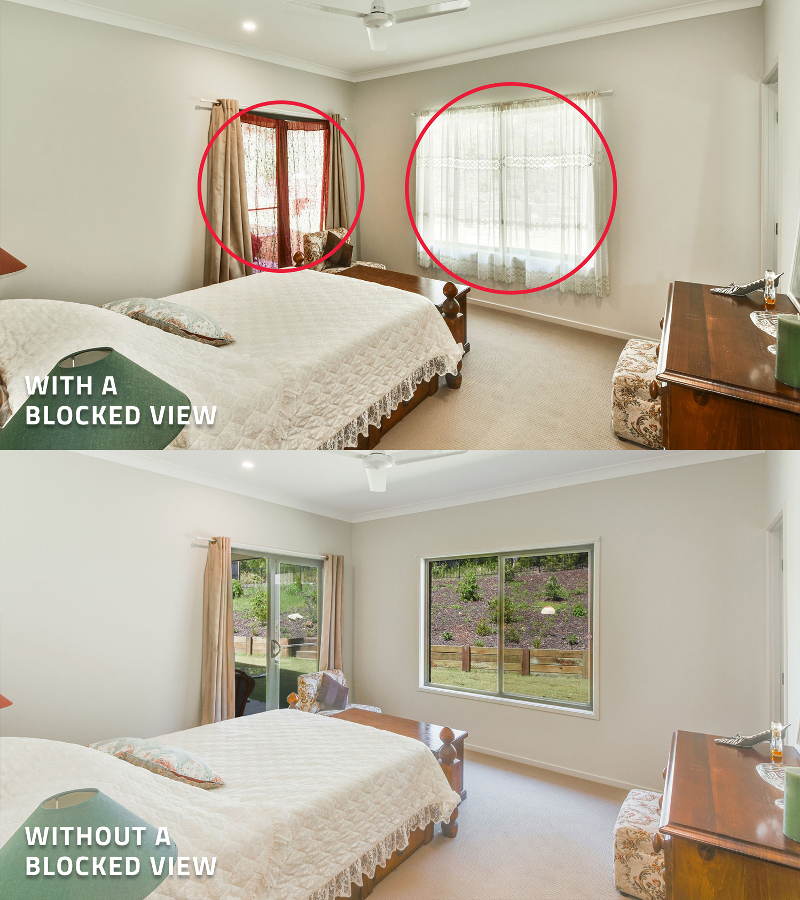
4. Open Curtains if There Is a View
If you have curtains that are blocking a view, remove the blinds to open up the room, bring more light in and really highlight the view. This can also be a major selling point.
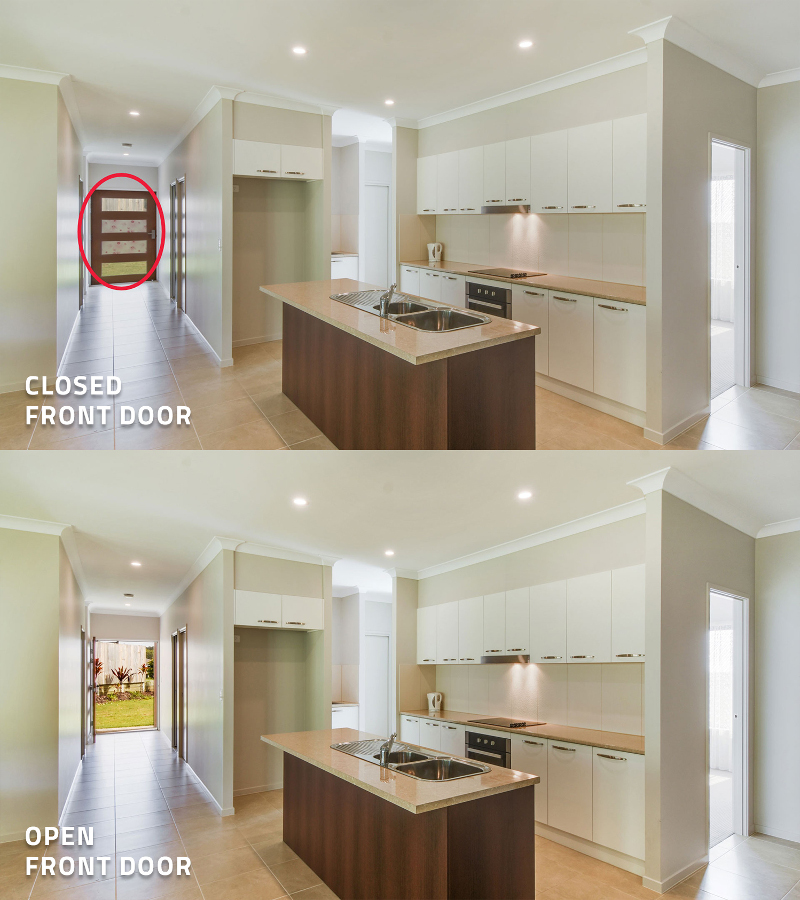
5. Open Doors to Create Space
By opening the front door, you are bringing the outside in and creating space in the home. This also creates a warm and welcoming feeling for your potential buyers.
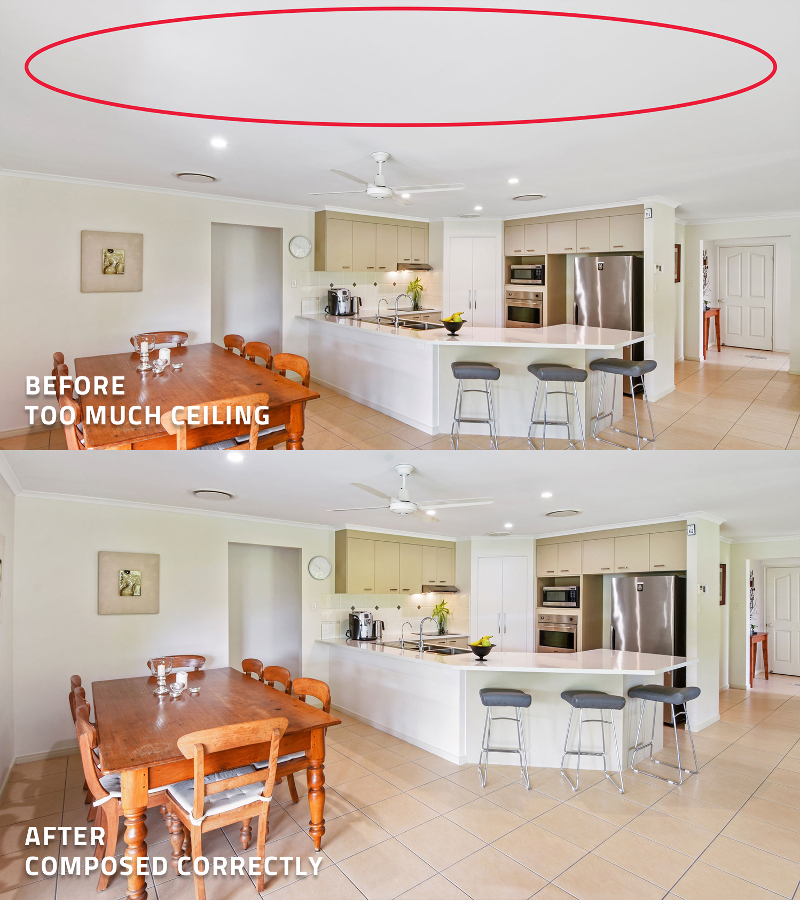
6. Don't Shoot with Too Much Ceiling or Roof
Potential buyers aren't going to want to look at images that are mostly ceiling. Create a happy medium without exposing too much ceiling by capturing the image at eye level. This will give buyers a realistic expectation of what they will witness when stepping foot into the property.
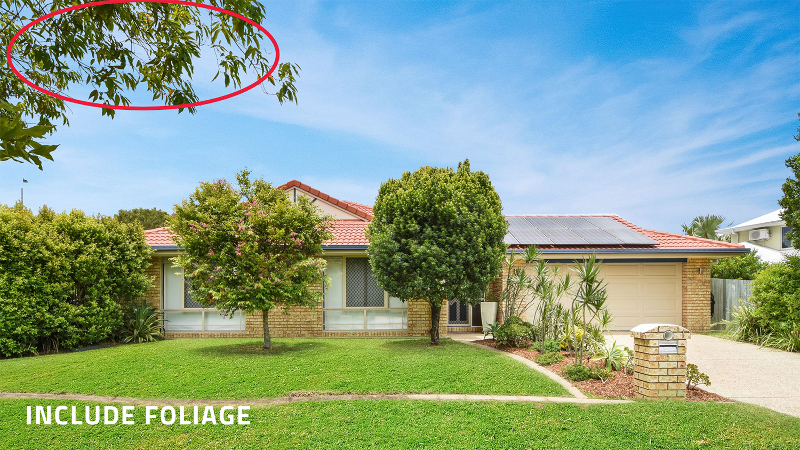
7. Try to Include Tree Foliage
Images look a lot more appealing by including surrounding foliage in the external shots. You also want to make sure those blinds are pulled up on those external shots. For internal, you might be able to add some funky furniture in the foreground to make the room more appealing.
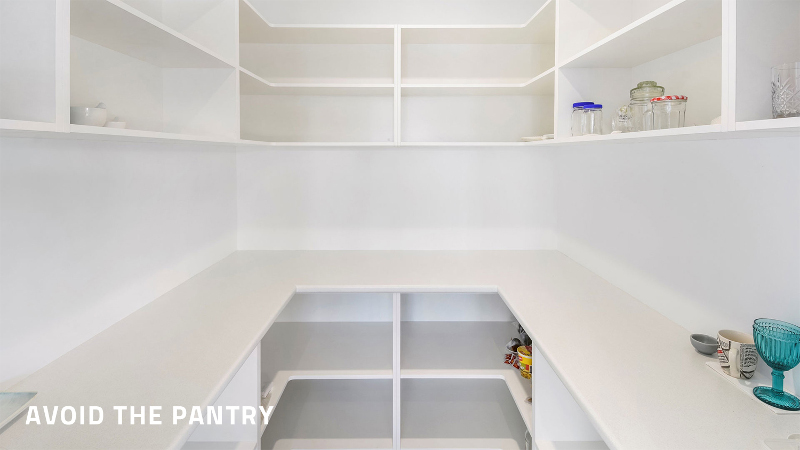
8. Don't Shoot the Pantry
This one might be obvious to some and not to others. They are very rarely used as a selling point, unless the owner specifically asks for the pantry to be shot or you have an interstate buyer. Don't waste that shot unless you are told to.
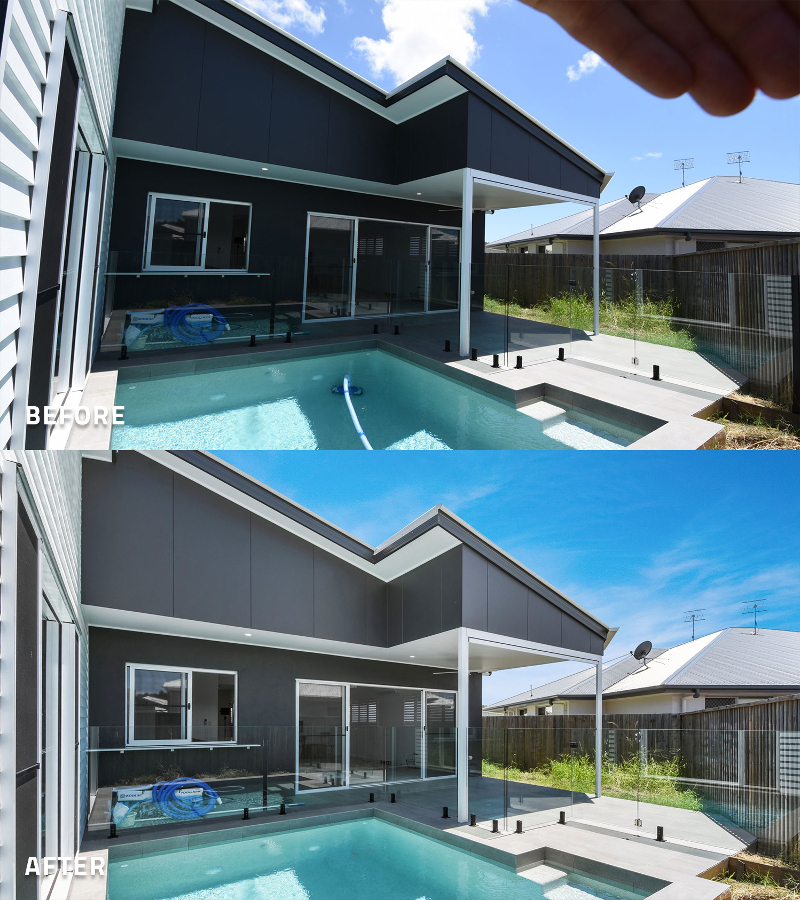
9. The Hand Trick
Sometimes when shooting in direct sunlight, a lens flare can appear in your images. To avoid this, put your hand over the sun when you take the shot. Be careful not to cover over any foliage or part of the property with your hand, or it will cost you more in post-production to edit and replace what your hand is covering.
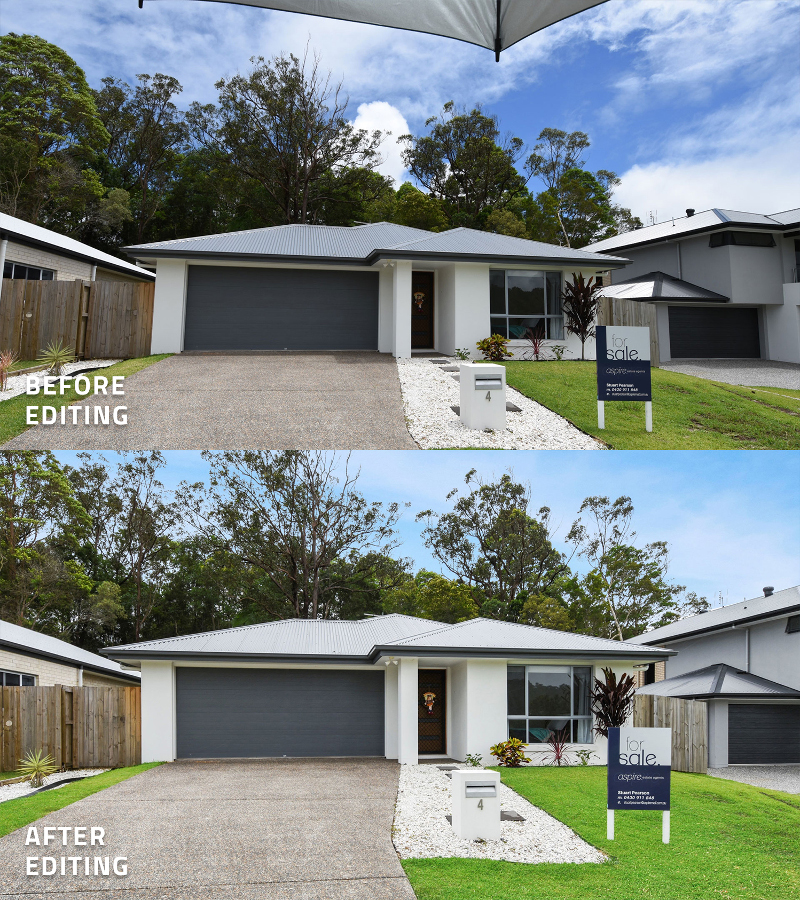
10. Shooting in the Rain
Don't worry about shooting in the rain—you can still make your images look professional even if you capture some of your umbrella in your external images. Just make sure not to cover any foliage or part of the house with your umbrella. By following this simple step, you will get the perfect image every single time.
Conclusion
So there you have it—Brad's expert, yet very simple top 10 tips when it comes to photographing a property. Using these tips, you can create professional images that will showcase to potential buyers the very best of what your listing has to offer.
To view the original article, visit the BoxBrownie blog.