
RETECHNOLOGY PREMIUM MARKETPLACE RELATED PRODUCTS | WEBINARS | SPECIAL OFFERS


You are viewing our site as a Broker, Switch Your View:
Agent | Broker Reset Filters to Default Back to ListMac Users: Protect Your Data with Time Machine
February 16 2015
 All modern Mac computers come with a built-in backup solution that many Mac users do not utilize. This utility is known as Time Machine. It is very simple to use, and, most importantly, it's FREE (external hard drive not included.)
While there are many online and offline backup solutions from multiple third party companies and manufacturers, all Mac users need to back up a full system image of their data is to connect an external hard drive using a USB, FireWire, or Thunderbolt cable (depending on the ports available on your Mac.) Time Machine can also be backed up to an AirPort Extreme device, an AirPort Time Capsule device, or an OS X Server on your network, if applicable.
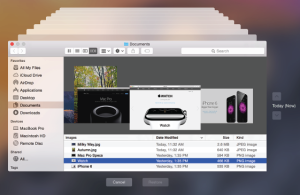
This external drive can be plugged in periodically to perform frequent backups or may be left plugged in so that it is constantly backed up. Time Machine does hourly backups for the past 24 hours, daily backups for the past month and weekly backups for all previous months. The oldest backups are deleted when your disk eventually becomes full, so you don't have to worry about not being able to backup new data at that point. The most convenient part about Time Machine is that you have the ability to restore any individually backed up files, or you can completely restore everything from an earlier backup. This means that if you lose something, such as an important file or family photo, you can open Time Machine, grab that file or photo right from the backup and restore it right away.
To begin the process:
- Obtain an external hard drive
- Plug in your external hard drive to your Mac computer.
- You should be prompted to back up with Time Machine.
- If you do not see the prompt, you can open Time Machine Preferences by clicking the Time Machine icon, which should be on the top right corner.
- Or, select the black apple icon on the top left corner of your screen, click on System Preferences, then open the Time Machine option.

- Once you have Time Machine Preferences open, click the Select Backup Disk button.
- You should see a list of available devices to use as your backup disk. In this list, the external hard drive you plugged in should appear as an option under Available Disks. Select your drive, and then click the Use Disk button to assign it as a backup destination.
- At this point you can turn Time Machine on, and it will begin the first backup.
- Once your backup is finished, you will be prompted with a message advising you that the first backup is complete.

As always, if you have any questions or have any difficulties, please contact us. We'll be glad to assist you with your setup.
To view the original article, visit the Tech Helpline blog.