
RETECHNOLOGY PREMIUM MARKETPLACE RELATED PRODUCTS | WEBINARS | SPECIAL OFFERS


You are viewing our site as an Agent, Switch Your View:
Agent | Broker Reset Filters to Default Back to ListA Realtor's Playbook for Creating Facebook Lead Ads
October 22 2018
 Today, more than 80 percent of Internet users are active on Facebook. As the world's most popular sharing medium, the social media giant reaches all ages, genders, lifestyles and geographic regions, making it more inclusive than any purchased client list, according to The Real Estate Agent's Guide to Social by Better Homes and Gardens Real Estate LLC.
Moreover, the audiences an agent can reach by way of Facebook are considered willing participants—in this case, buyers, sellers, and fence sitters who eagerly await informative posts about their community—presenting a perfect opportunity for REALTORS who aim to build their businesses (lead generation) through relationship building.
Here, RPR offers a detailed step-by-step plan for building and deploying a Facebook Lead Ad to a custom audience of your choice.
Lead ads are unique in that they can be customized to place your offer—such as a newsletter opt-in, a request for a free home valuation, upcoming neighborhood open house schedule or a local market activity report—in front of potential prospects. It's all possible because lead ads come with simple forms that capture a prospect's information within Facebook. The forms will even pre-populate a prospect's information such as name, email or phone number.
For this example, we'll create a lead form for a REALTOR® who is offering a local market activity report with a free home valuation to a target audience. The market activity report will come from RPR and will be available for the prospect to download directly after they complete the Facebook Lead Form.
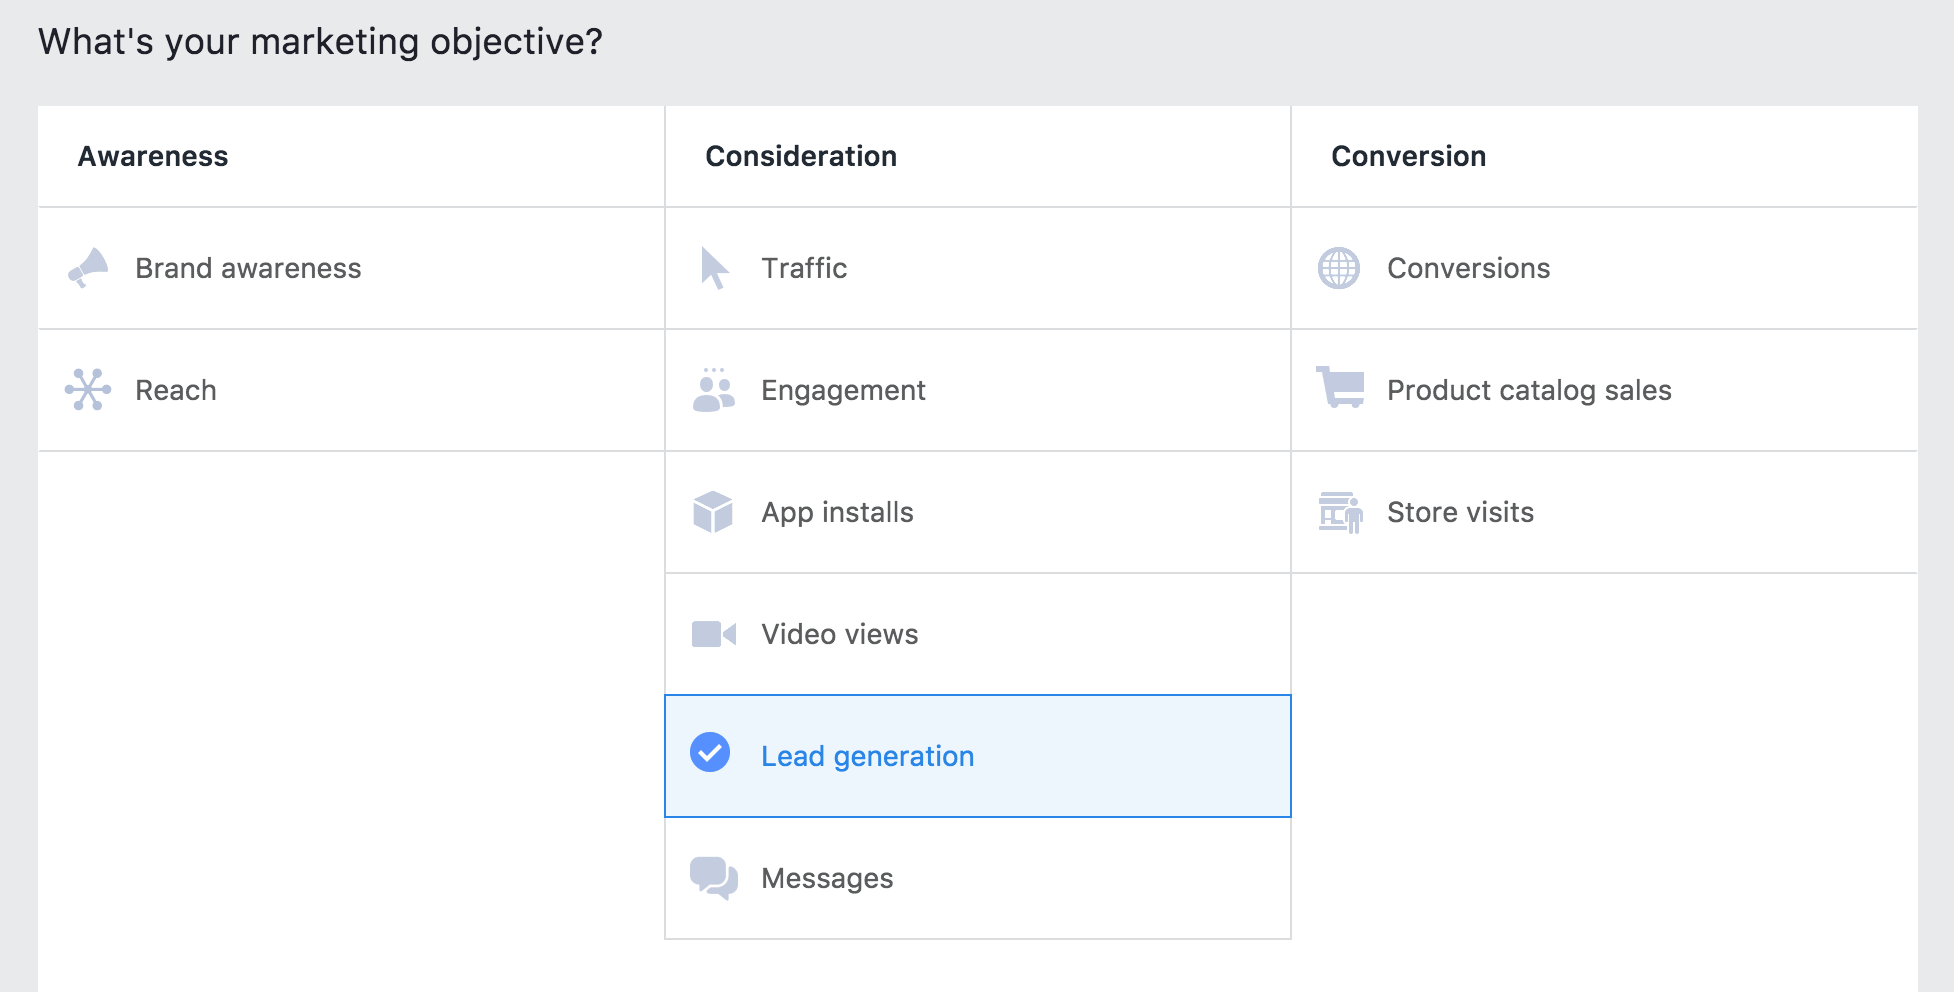
Step One
Choose Campaign Objective
First, start by selecting the marketing objective. For this example, choose Lead Generation, because it will also include the Lead Form option.
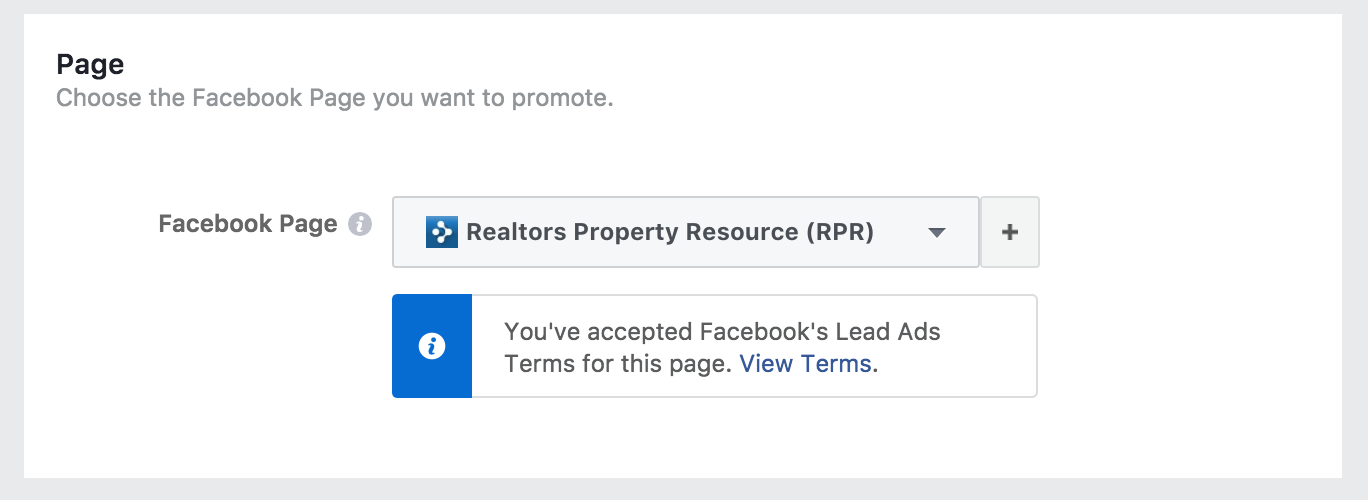
Step Two
Select Your Page
Select the page that will be used to create your lead ad.
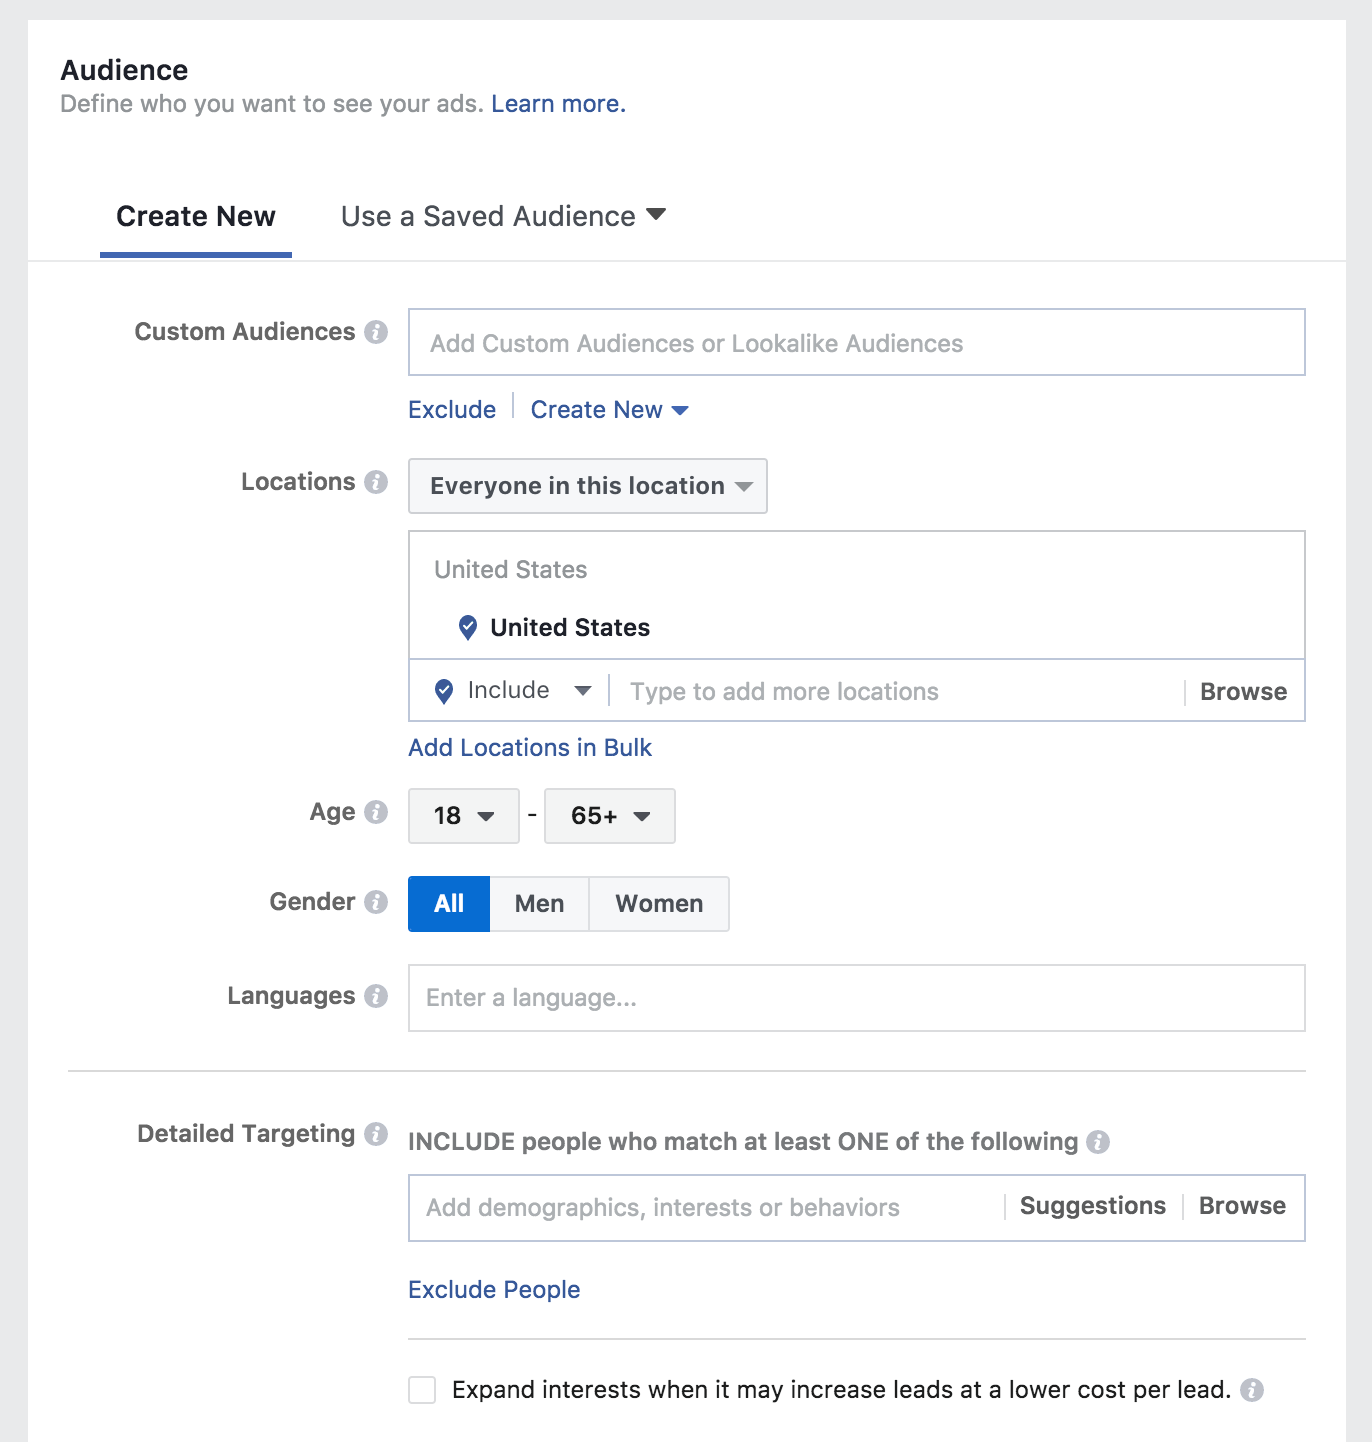
Create Your Audience
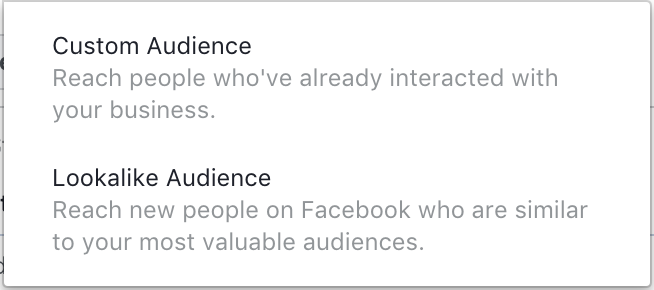
Ads can be targeted by location, interests, connections and more. Or choose to build an audience based on people you already know, such as sphere of influence, past clients or prospects. Take it further by selecting a Lookalike Audience, which enables Facebook to locate other people who are most similar to your audience source.
In this example, locate the Custom Audiences field, choose Create New and then Custom Audience.
Create a list of your contacts (if you don't already have one). For each, assign a Lifetime Value (LTV)—a 1–5 rating that depicts the value each customer has brought to your business, e.g., through a transaction or referral (5=high value) vs. an acquaintance you have not yet done business with (1=low value). Facebook will use the LTV to put messages in front of new people with characteristics similar to your highest value contacts.
- Import your contact list into a CSV or TXT file.
(For tips on how your data file should be formatted, see Facebook's Customer Data Preparation Best Practices.) - Log in to Facebook.
- Visit Facebook Ad Manager, navigate to Audiences.
- Click Create Audience and then Custom Audience.
- Choose Custom File.
- Select Include LTV for Better Performing Lookalikes.
- Upload your CSV or TXT file. To maximize the potential match rate, include as many identifier columns in your file as you can, such as first name, last name, email, phone, city, state, ZIP, birth date, gender, age, LTV, etc.
- Name your audience. Select Next.
- Use the dropdown to choose the columns with an LTV. Select Next.
- Facebook will attempt to map the columns. Verify that each is correct. Fix where needed using the dropdown to select the appropriate fields.
- Select Upload and then Create.
Your audience is saved to Facebook's Audience Manager. A confirmation with the number of rows added will appear.
Next, follow these steps to create a Lookalike audience—people who are likely to be interested in your business because they hold similar characteristics to your high-value LTV contacts.
- Click Create Lookalike.
- Target the county or region, number of lookalike audiences, and audience size percentage.
- Add any additional targeting.
- Choose Save Audience.
Placements, Budget and Schedule
Customize the placement, budget and schedule for your lead ad.
Step Three
Set up Ad Format and Creative
Set the Ad Name then select Facebook Page and Instagram account. Choose one of the following layouts for your ad:
- Carousel: Two or more scrollable images or videos
- Single Image: Six ads with one image each at no extra charge
- Single Video: Ad features one video
- Slideshow: Looping video ad with up to 10 images
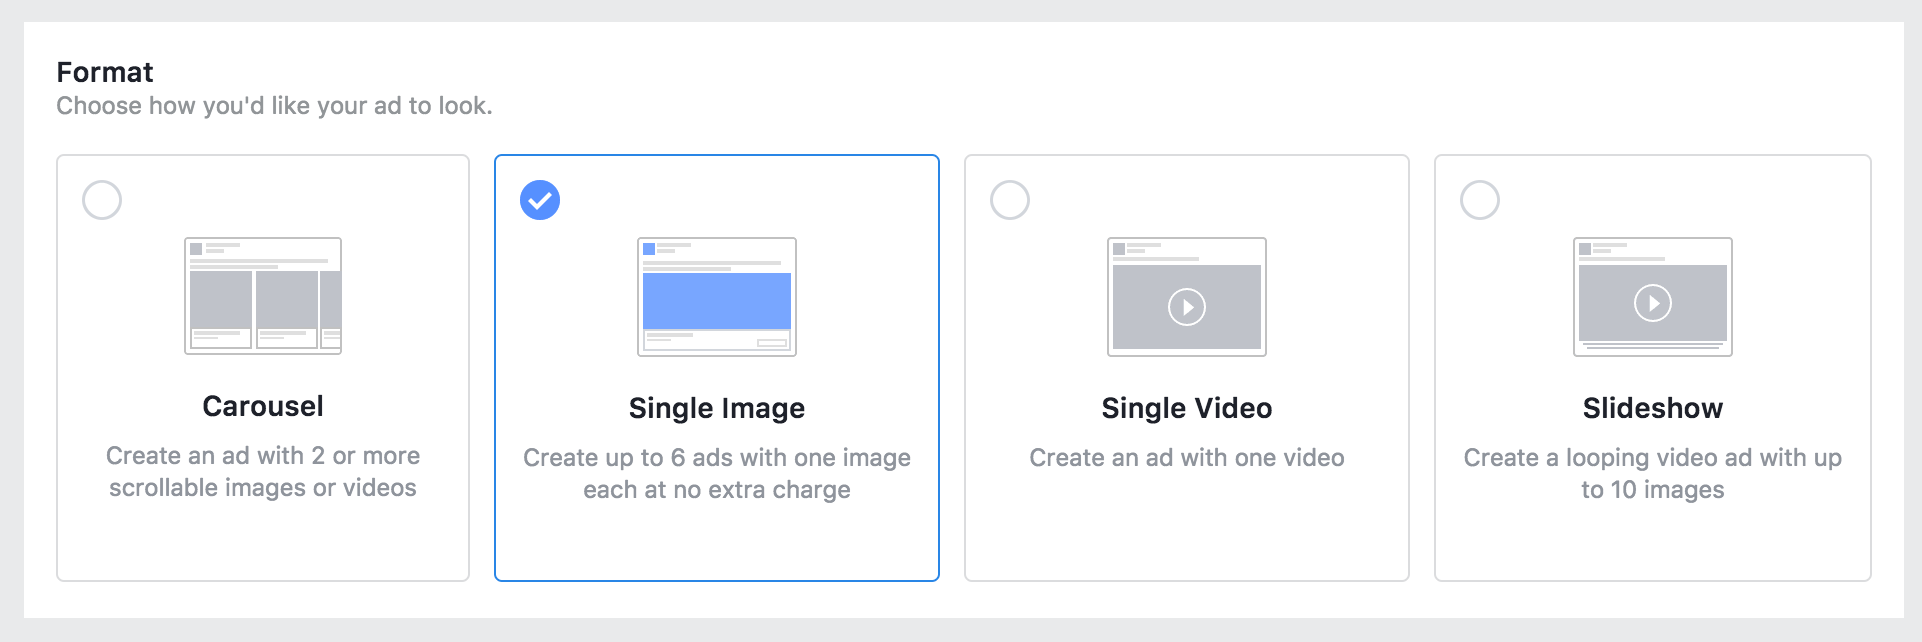
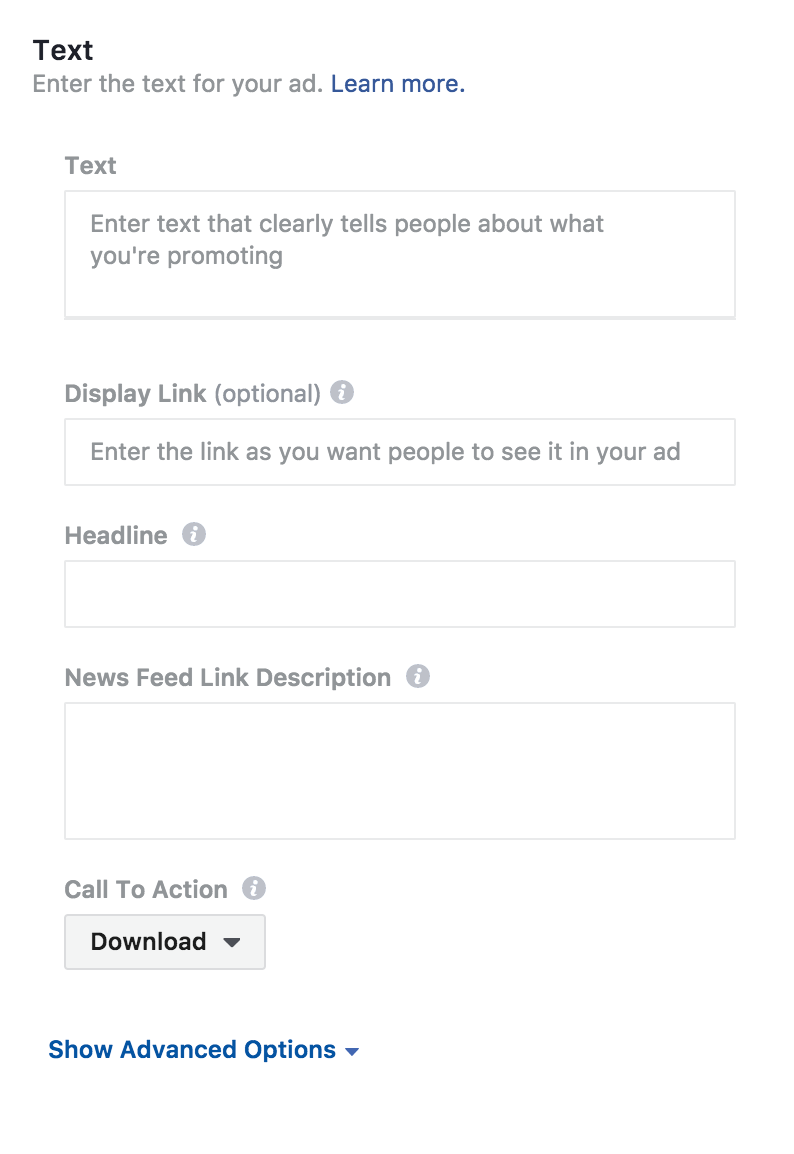
Add images or video based on your ad format. Fill in the ad headline, description and select the Call to Action button.
Create a Lead Form
- Choose New Form.
- Select the small pencil at the top left and give your form a name.
- Locate the Form Type section, and choose either More Volume or Higher Intent.
- From the Intro section, customize your headline and upload an image. (1200px x 628px)
- If preferred, use the same art from your ad.
- For the main descriptive copy, switch between paragraph and bullet formats.
- From the Questions section, enter a headline.
- A little lower in the same section, go to User Information.
- Choose the information you want to collect by checking the box for each element. Keep in mind, user information fields will be pre-populated if a person's Facebook profile includes that data. To see all available fields, click Show More Options. Create your own questions by clicking on Add Custom Question and then selecting a question type.
- From the Privacy Policy screen, include a link to your privacy policy — a legal requirement if you are collecting customer information. If you need help creating your Privacy Policy, visit the Better Business Bureau and review their sample Privacy Policy.
- From the Thank you screen, customize your confirmation message, i.e., the message that appears directly after someone submits the form.
- Add a headline, message, and call-to-action button to meet your needs.
- The call to action button can be View Website or Download. For this example, choose Download. This is where you can include the URL to a downloadable resource like an RPR Market Activity Report.
- Choose Finish.
To view the original article, visit the RPR blog.